Step 1 - Create Flow
Go to the components page and create a new flow.
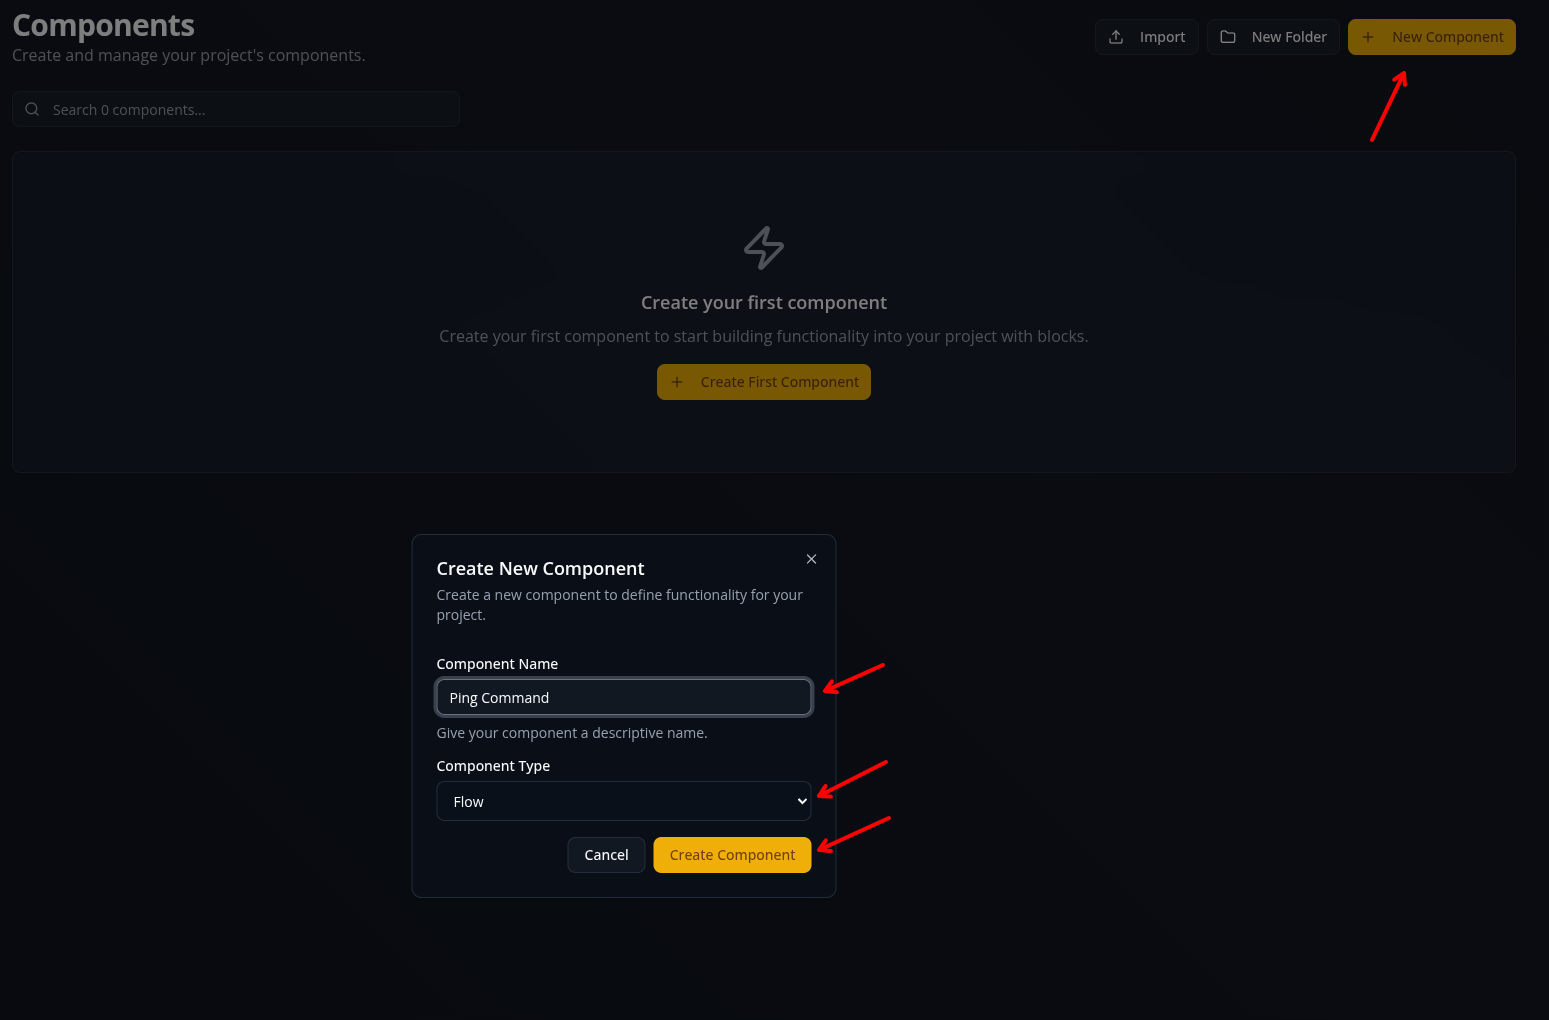
Click New Component, type in the name of your component, make sure Flow is selected, then click Create Component.
Custom blocks are a more advanced type of component you may want to use in the future, but for now you should create a basic flow.
Step 2 - Select Trigger
You will be put on the trigger selection screen. Type Slash Command into the search bar, and pick it as your trigger.
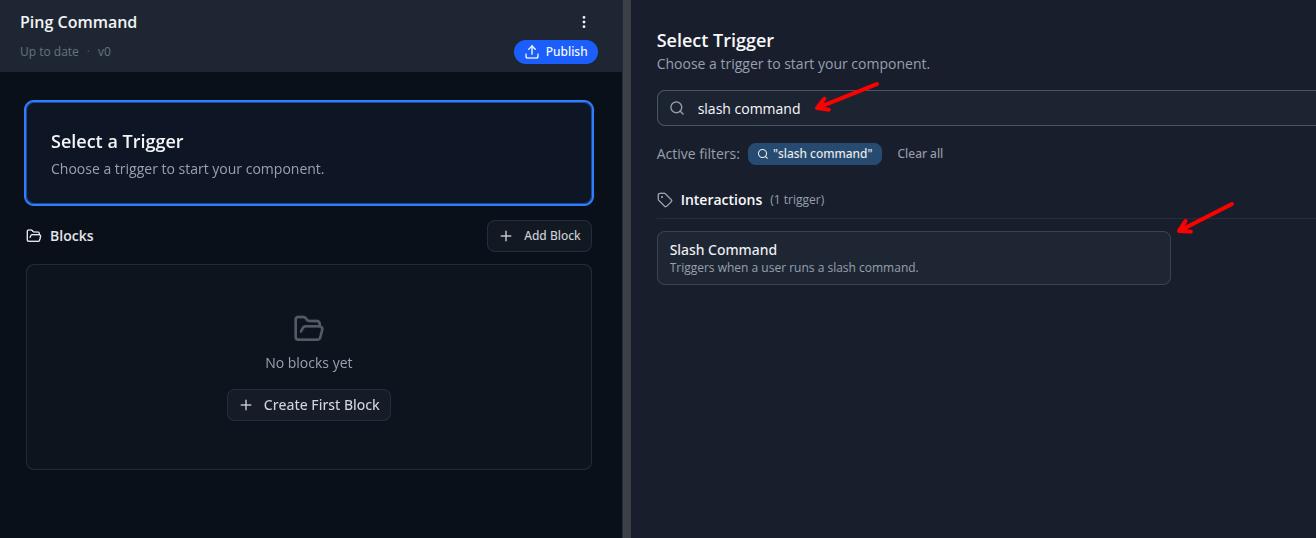
Triggers are what cause your flow to run. You can pick anything from a message being sent to a reaction being added or a slash command being run.
Step 3 - Configure Trigger
Configure the trigger by setting the command name and description. You can leave the rest of the fields blank/unchanged.
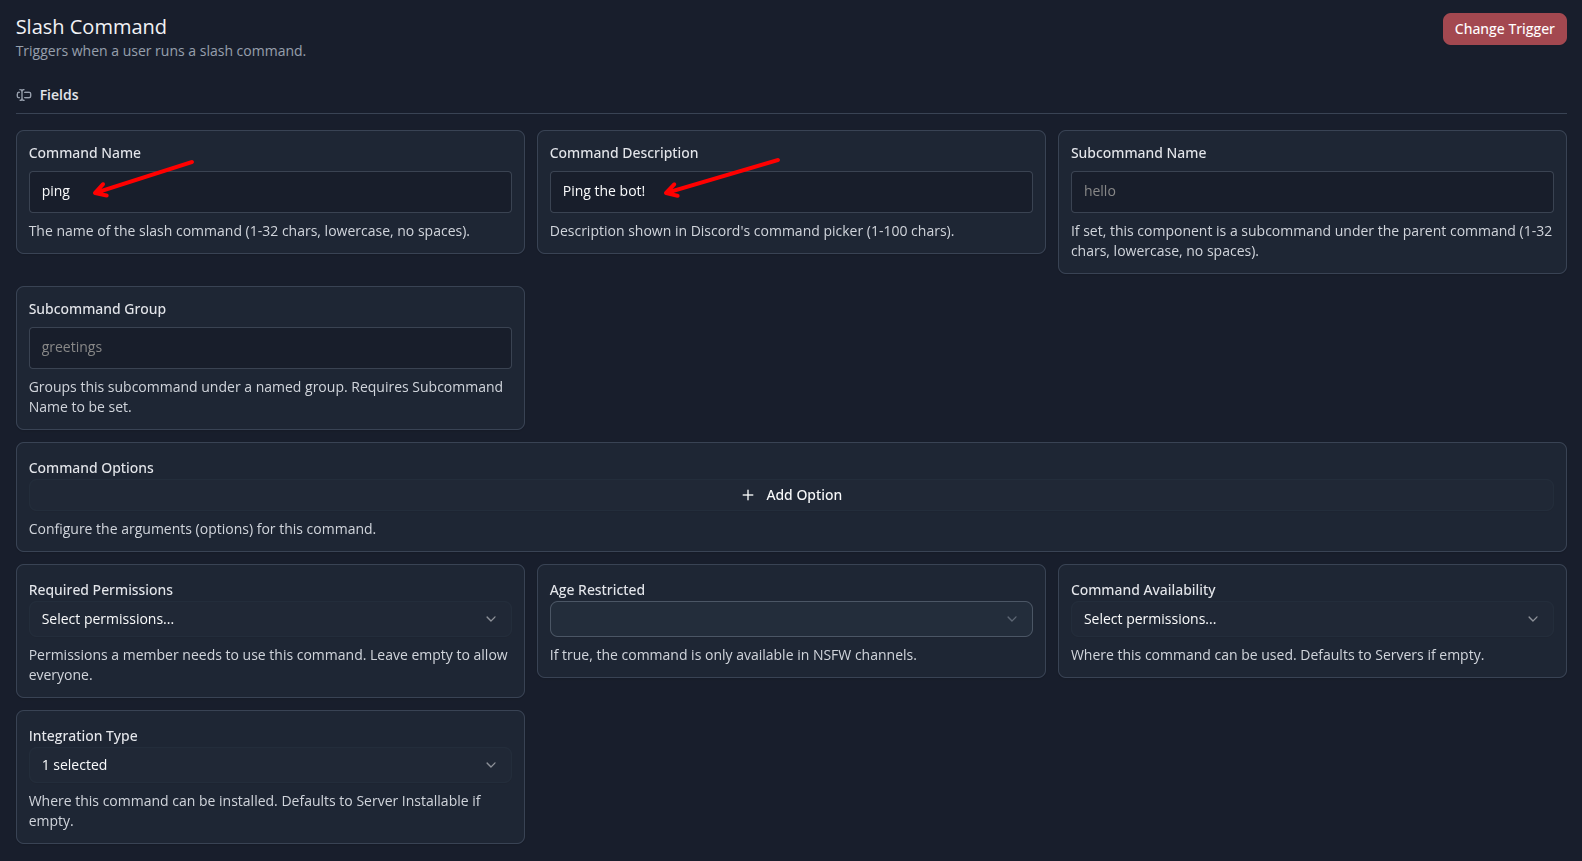
Command Options allow the user running the command to provide additional data (e.g. the ID of a user to ban). For a basic ping command, it isn't neccesary, but command options are powerful for more complex flows.
Step 4 - Add Blocks
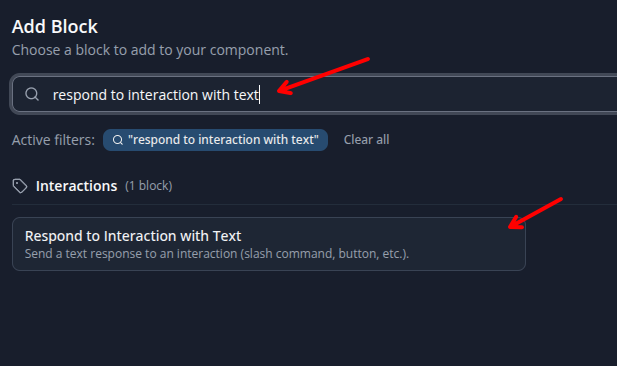
Click Add Block, type Discord API Ping into the search box, and add the block to your flow.
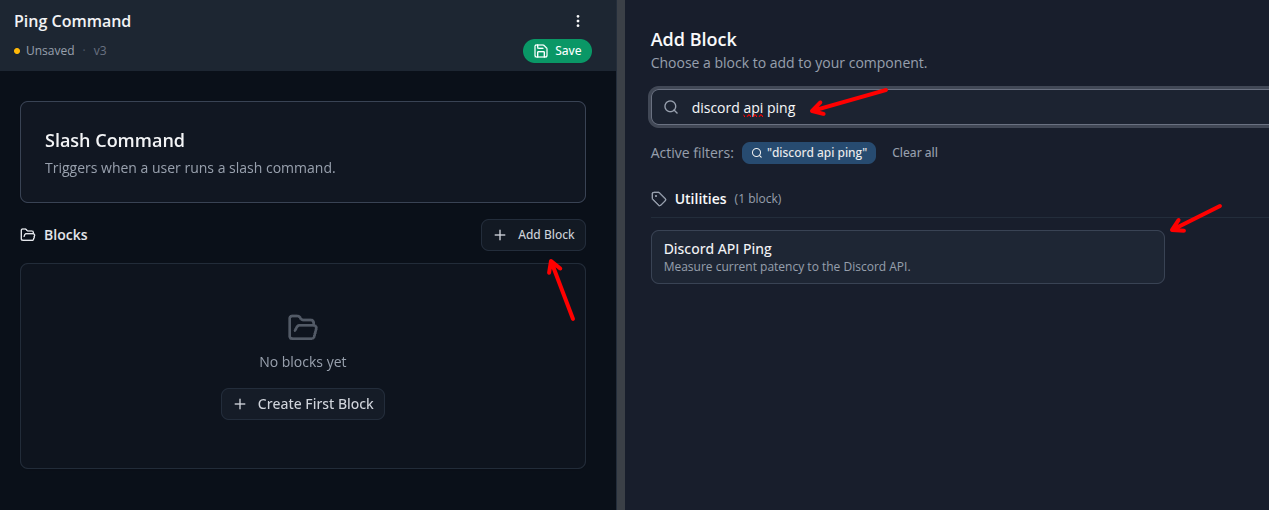
Now, search for Respond to Interaction with Text and add that block to your flow.
This flow has a Slash Command interaction trigger, so you want to respond using a Respond to Interaction block.
For flows without an interaction trigger, you will want to use a standard Send or Edit message block. See What are Interactions? for more details.
Step 5 - Configure Response
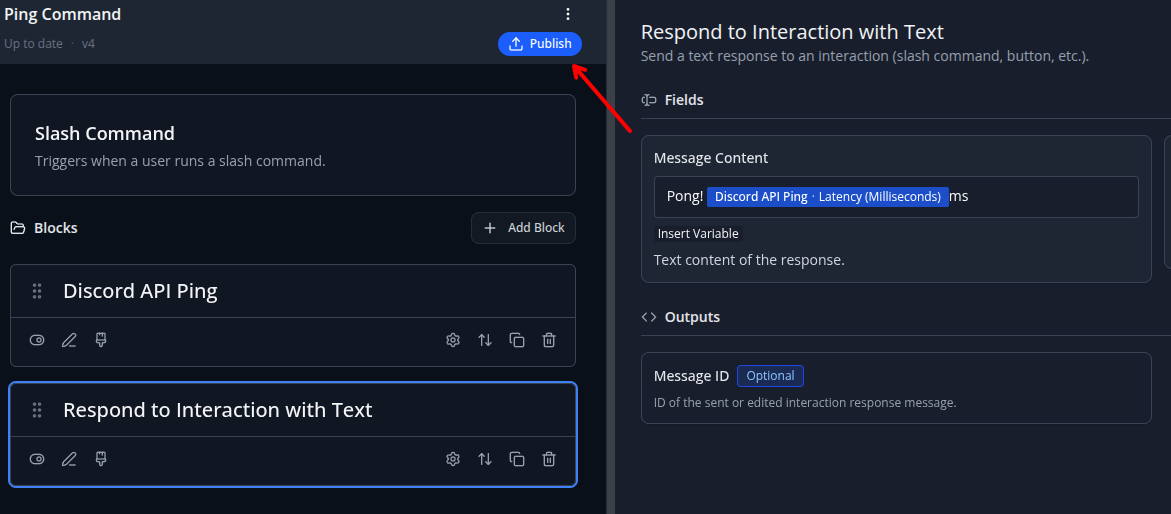
In the Message Content field, type Pong! then a space, then click Insert Variable below the field.
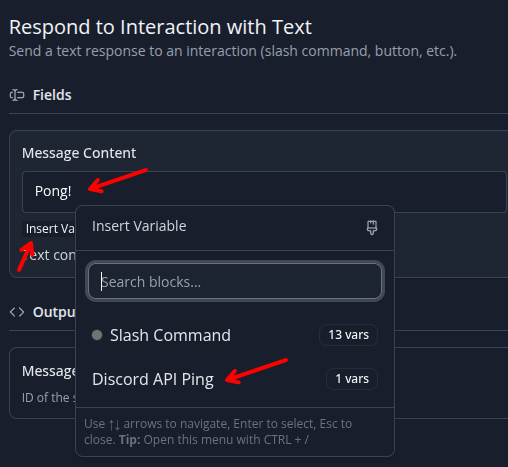
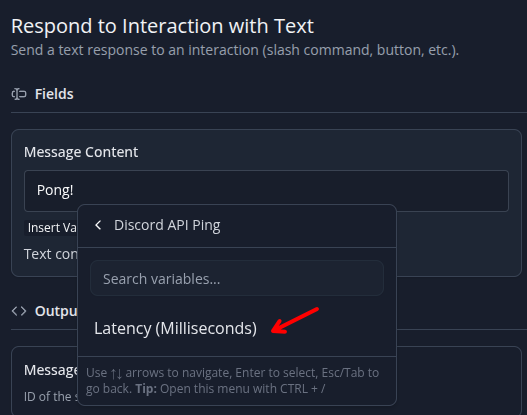
Select Discord API Ping, then select Latency (Milliseconds).
Type the letters ms after the variable.
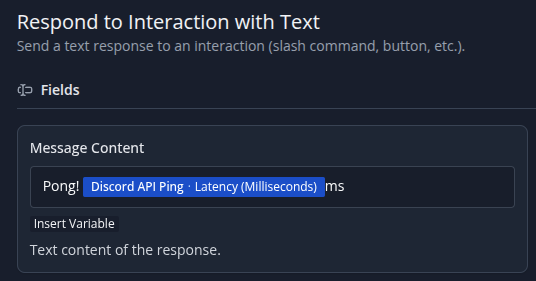
This will create a message that looks like: Pong! 100ms (if the output of the Discord API Ping block is 100).
You can use variables to pass data from one block to another. The Insert Variable menu makes it easy to insert the variables from one block into another.
In inventor.bot, you should avoid guessing or assuming a variable format (e.g. $user or {user} will not work) and always use the Insert Variable button.
Step 6 - Publish Flow
Publish your flow using the blue Publish button. You may need to click the green Save button (in the same location) before being able to publish.
Changes you make to flows are automatically saved, but the latest version of a flow doesn't start running on your bot until you click Publish.
Always remember to click Publish after making changes to flows if you want to see the changes on your bot.
Step 7 - You're Done!
On Discord, you should now see a /ping command that responds with something like Pong! 100ms.
You may need to reload/restart your Discord client before the command shows up in the list.
You've now created your first flow, congrats!