In this tutorial, you'll learn how to use buttons with inventor.bot.
This tutorial assumes you know the basics of inventor.bot- we recommend doing the Ping Command tutorial if you haven't already.
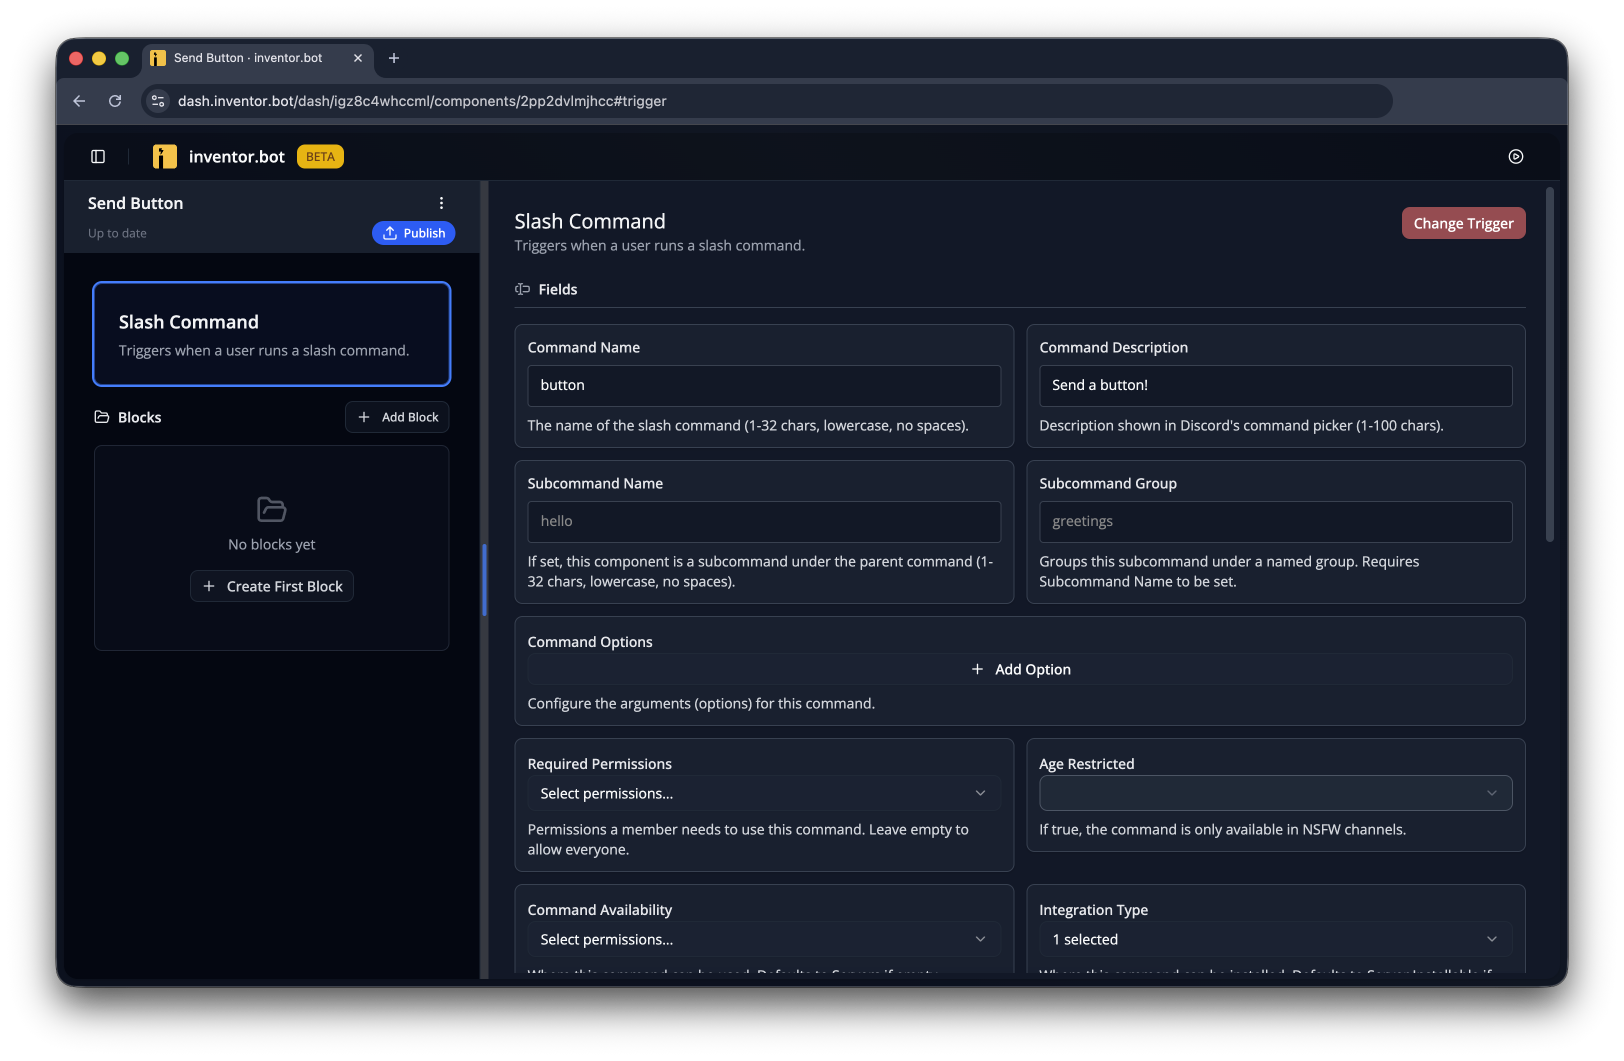
Start by creating a flow to send the button. In this case, we'll use a Slash Command called /button, but you can send a button in any flow with any trigger.
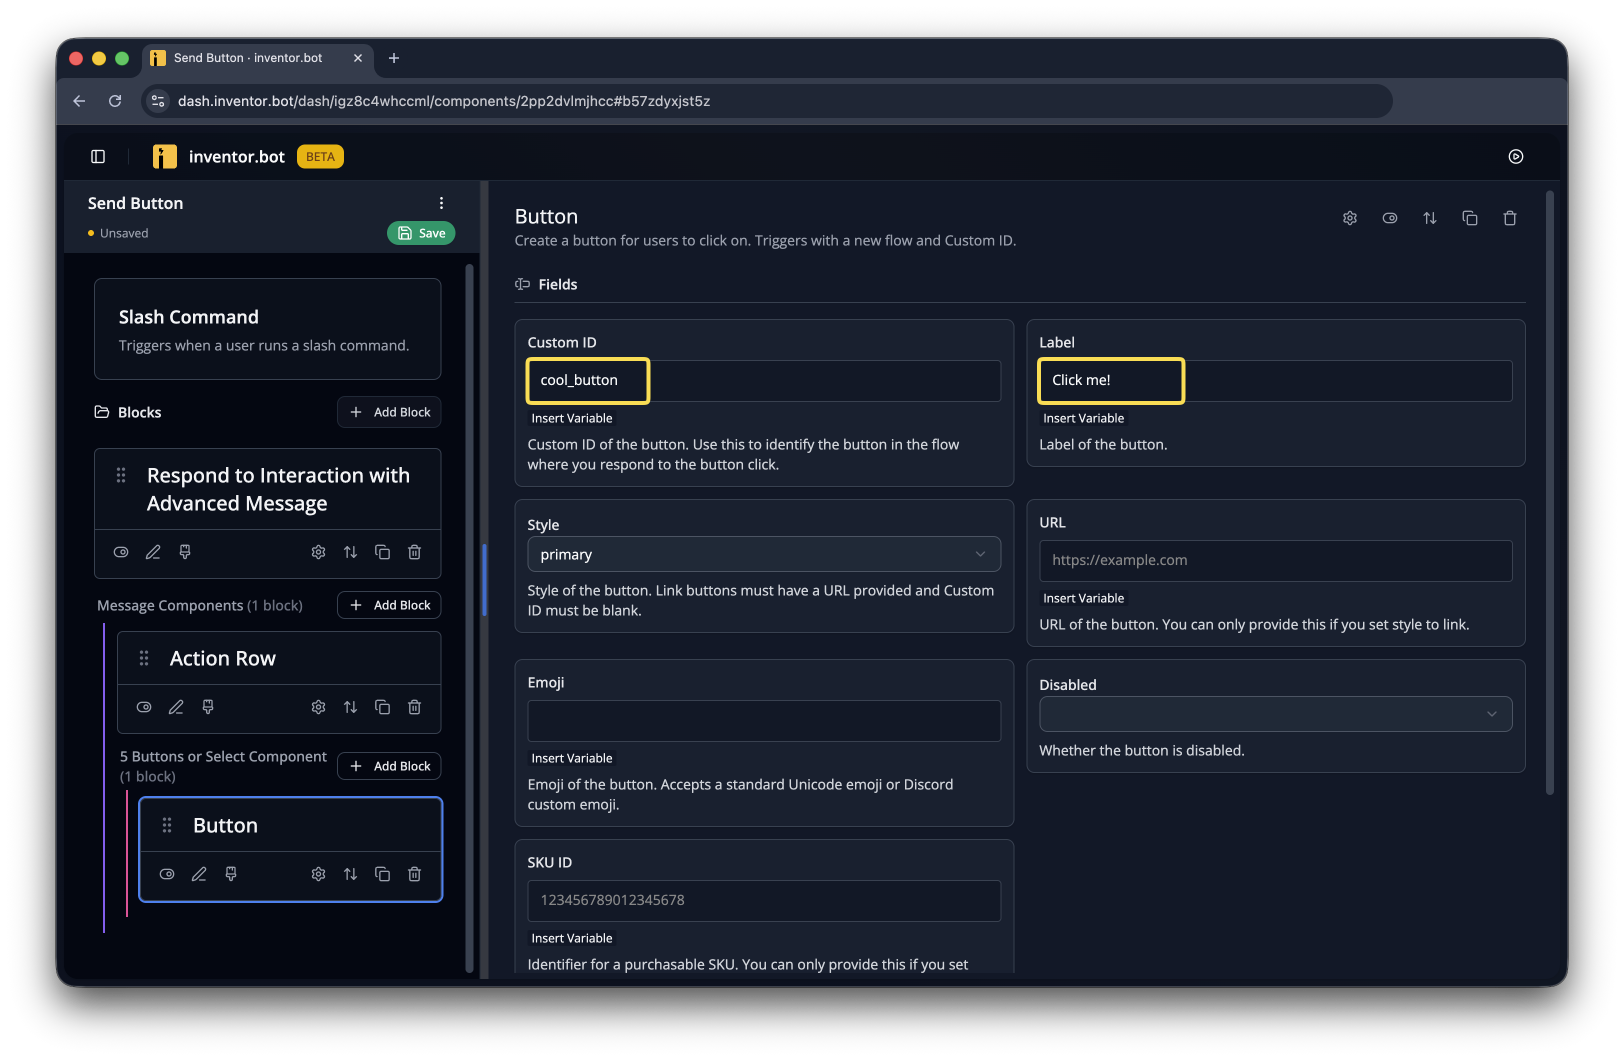
Now add a Respond to Interaction with Advanced Message block. Inside of that, add an Action Row with a Button inside- give it a Custom ID and a Label. You'll need to use that same Custom ID later, so don't forget it!
If you used a non-interaction trigger, like Message Sent or Member Join, you'd need to replace the Respond to Interaction with Advanced Message block with a Send Advanced Message one.
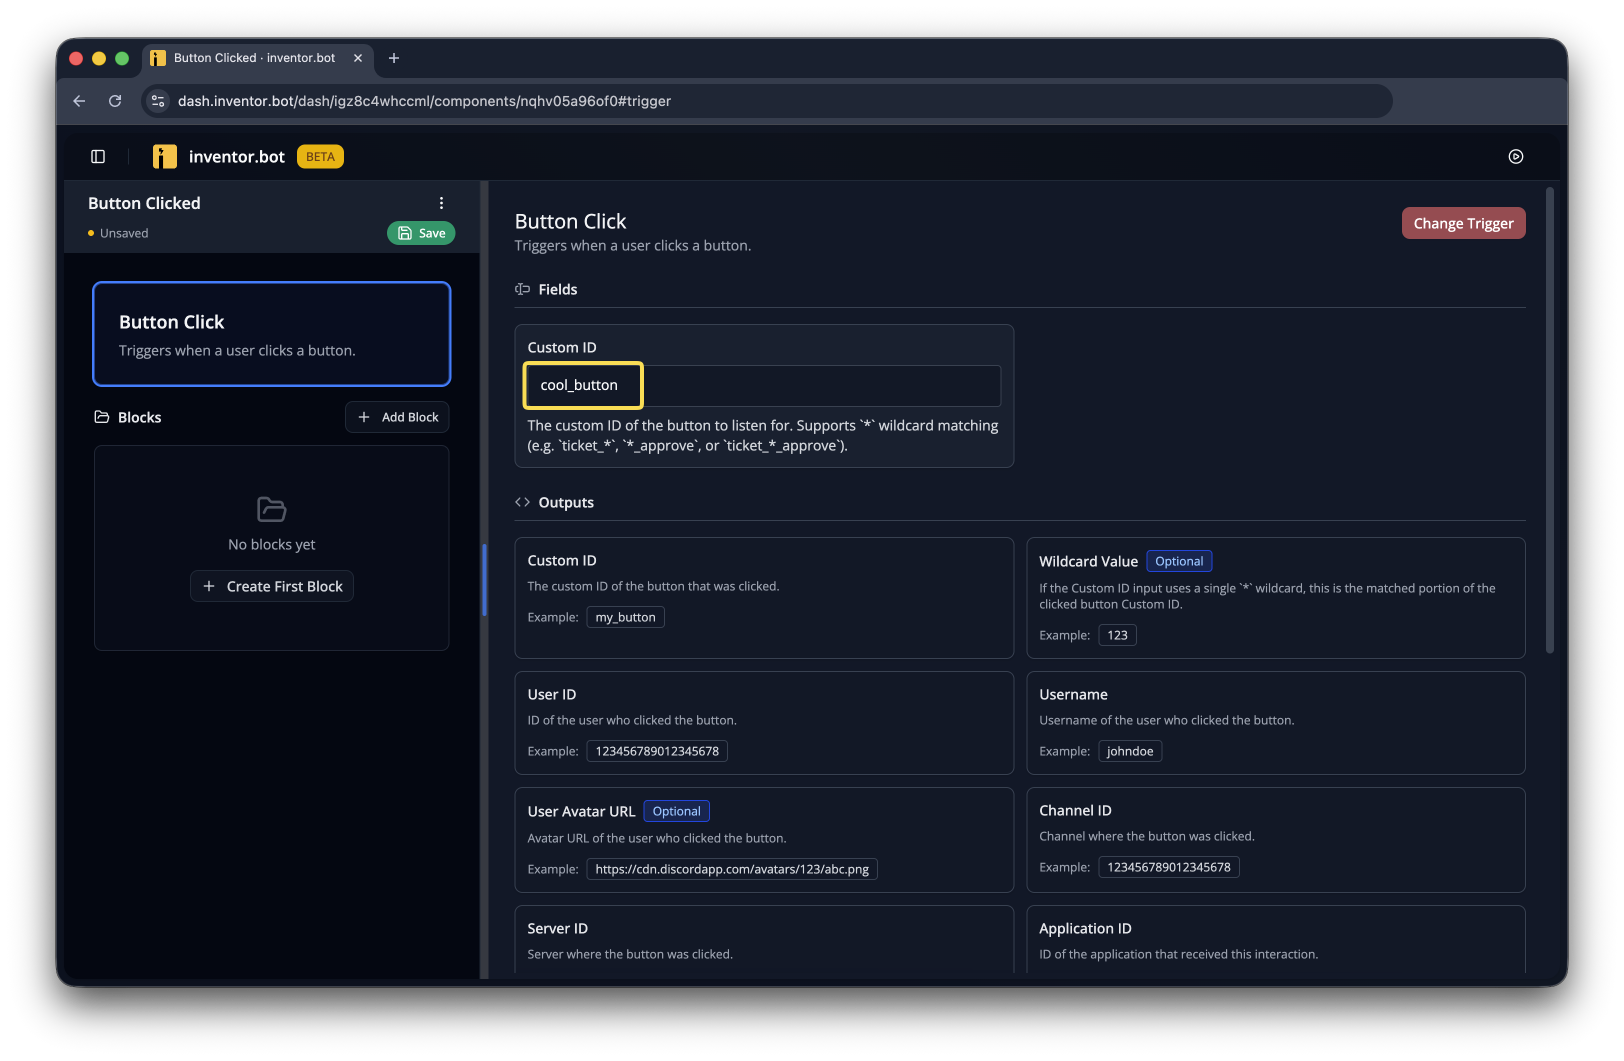
Create a new flow with the Button Click trigger and input the Custom ID you used in the previous flow.
You can add whatever blocks you'd like- for example, if you were creating a ticket system this could create a new channel for the ticket. Just make sure you respond to the interaction!
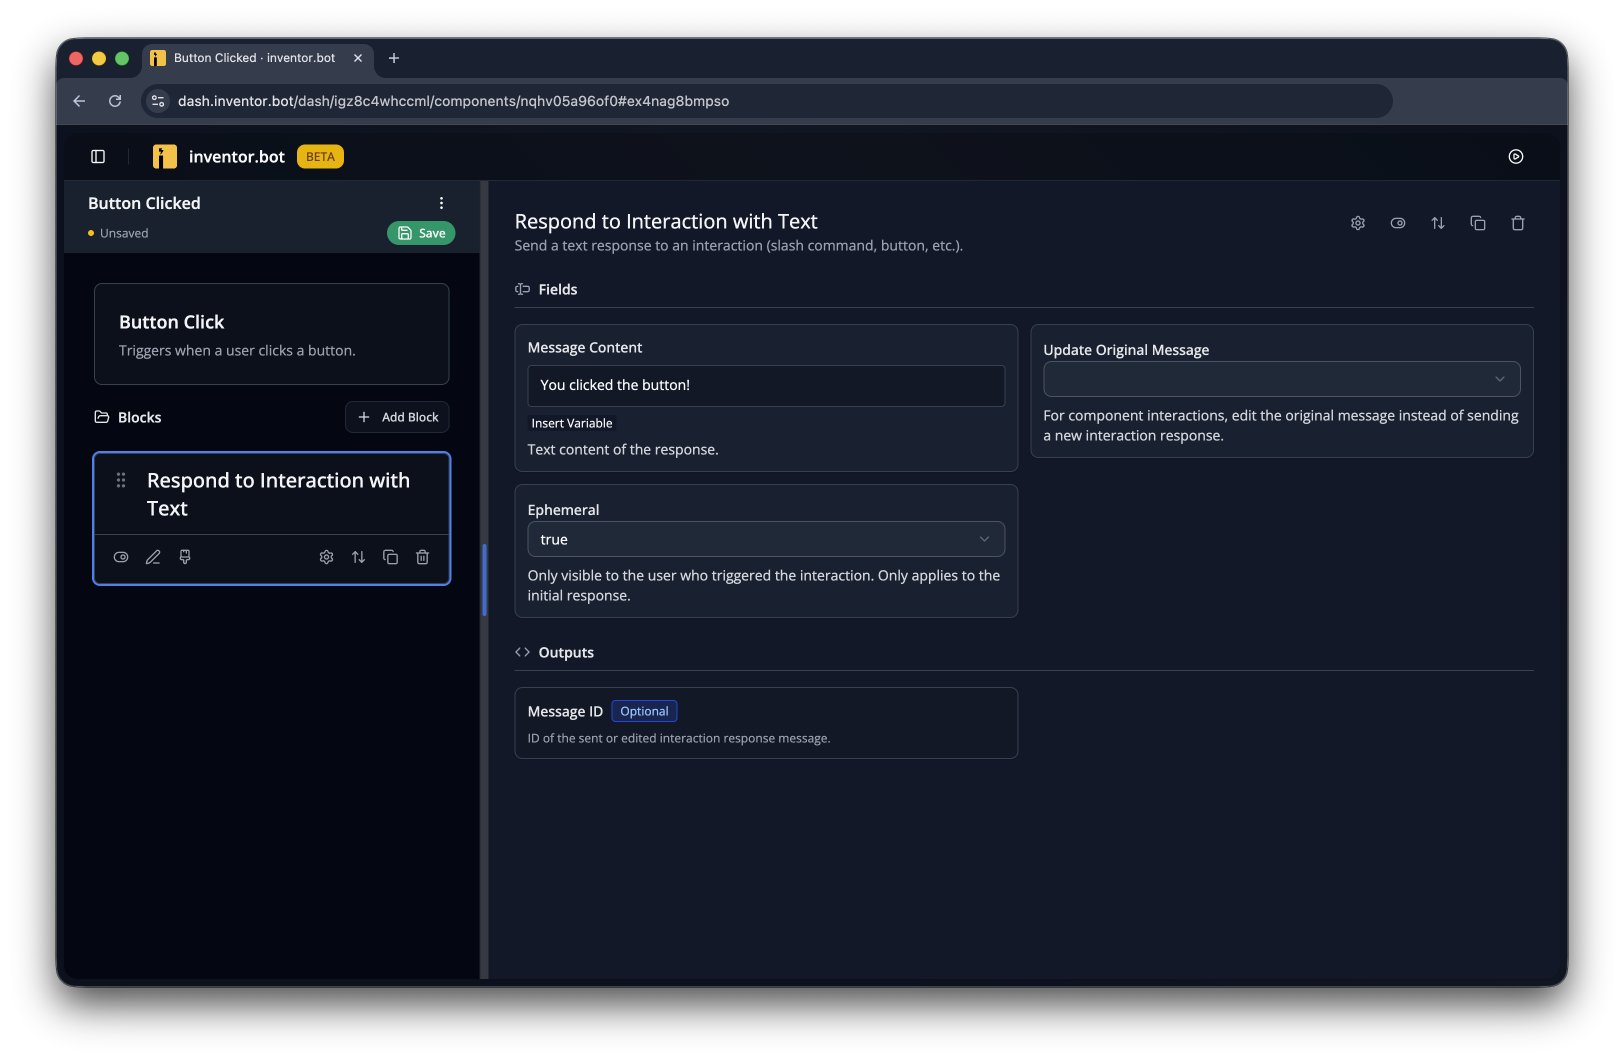
In this case, we'll use an ephemeral Respond to Interaction with Text.
Make sure both flows are saved and published, then run /button and then click the button it sends- you should see the response you defined in the second flow!