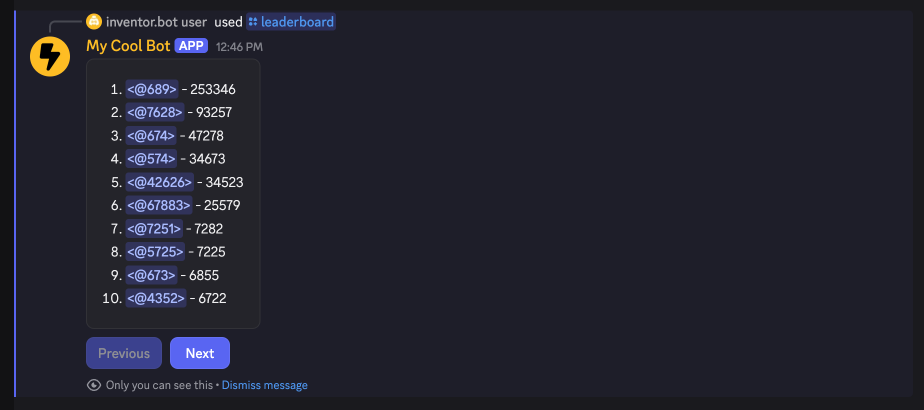
In this tutorial, you'll learn how to make a slash command that displays a leaderboard!
This tutorial assumes you know the basics of inventor.bot- we recommend doing the Ping Command tutorial if you haven't already.
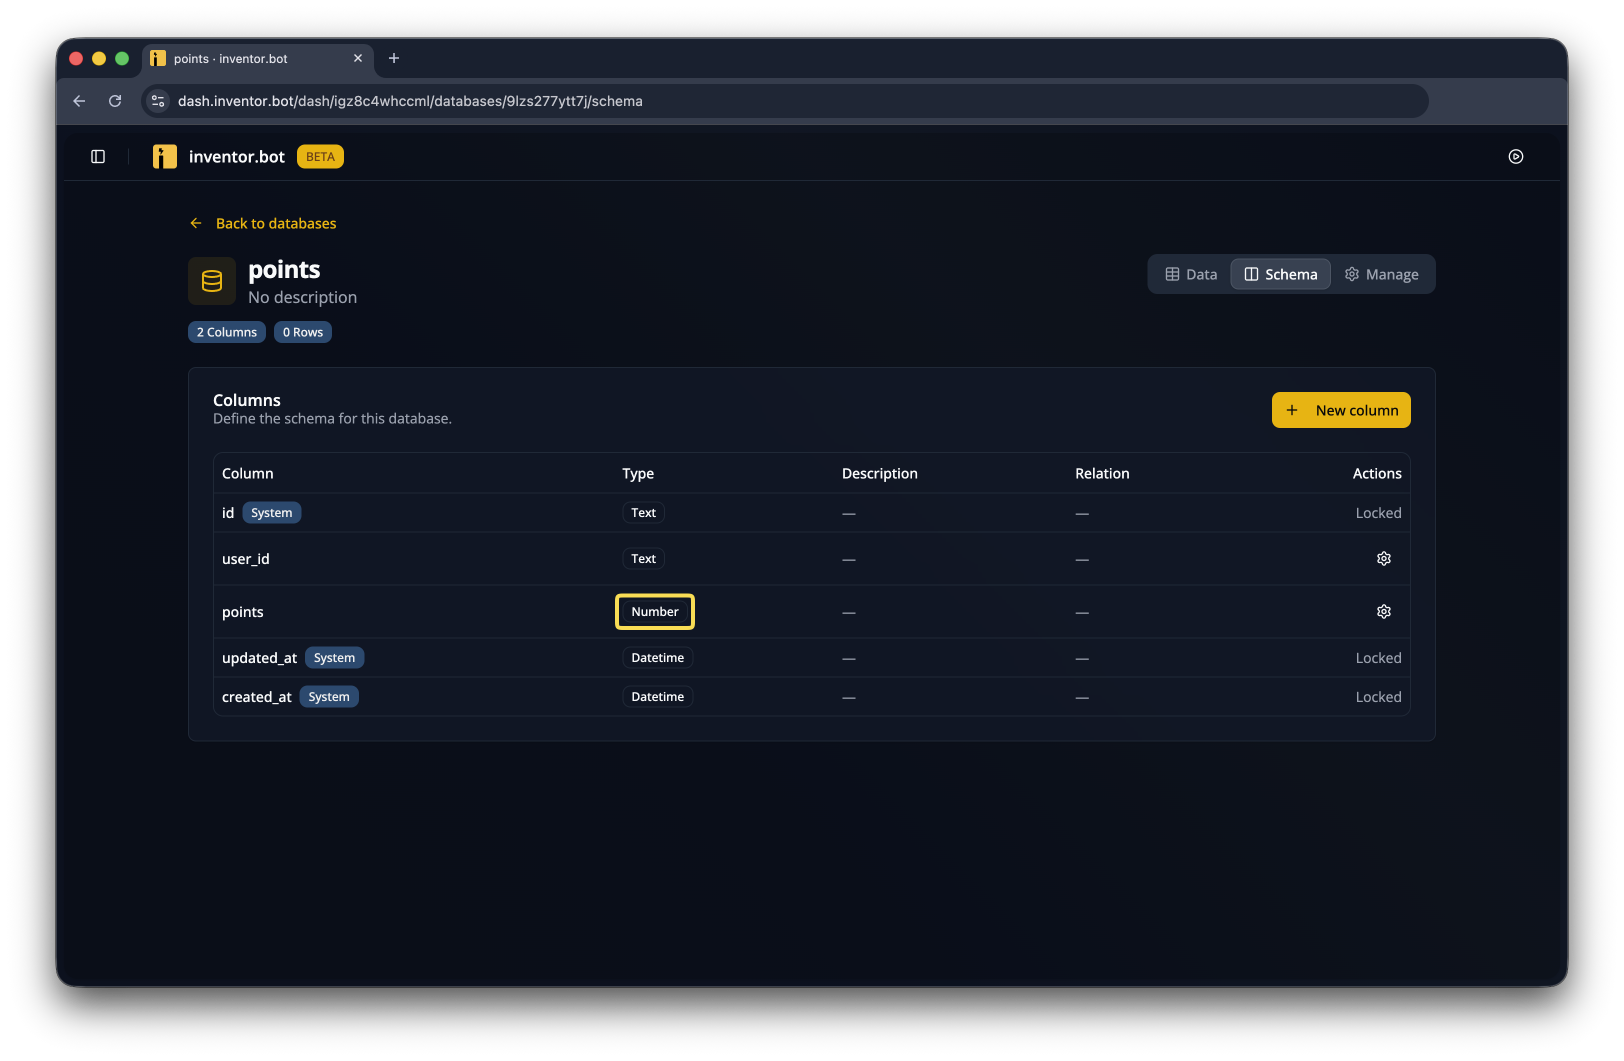
We'll assume you already have a database you want to make a leaderboard for. It could be xp, points, economy, etc., as long as it has a number column (make sure it's the number type!) and a column with a user ID!
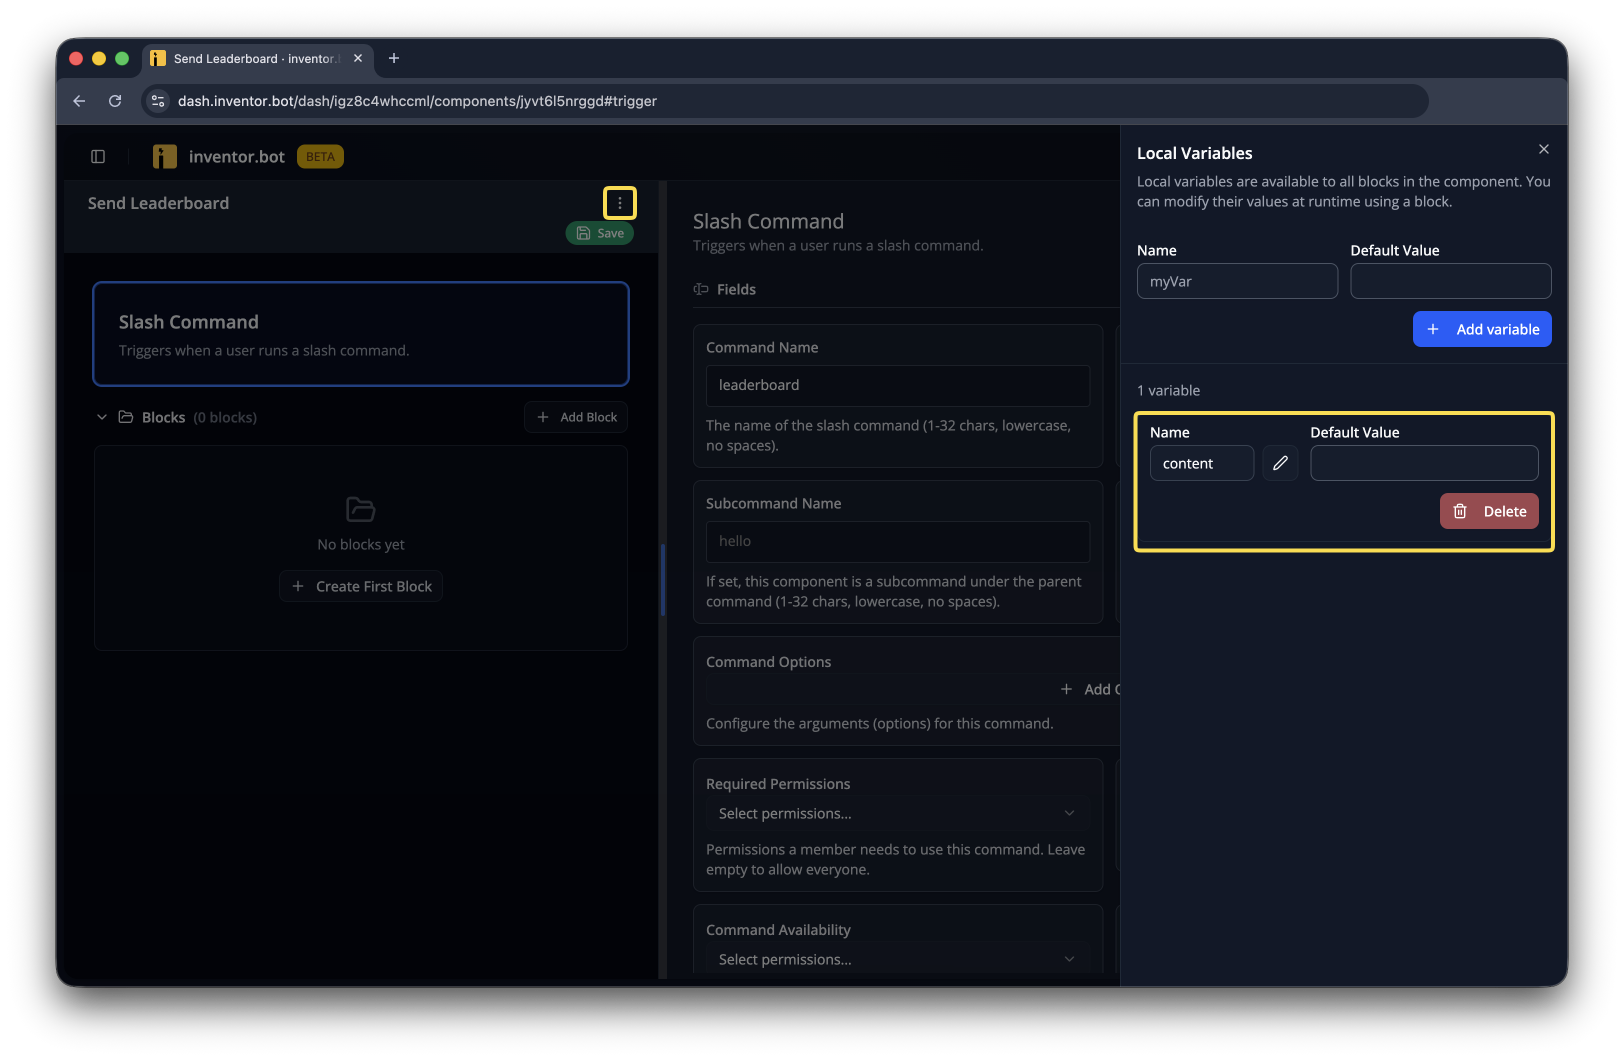
Add a local variable called content. You can access the local variable menu from the three-dot menu by the component's name.
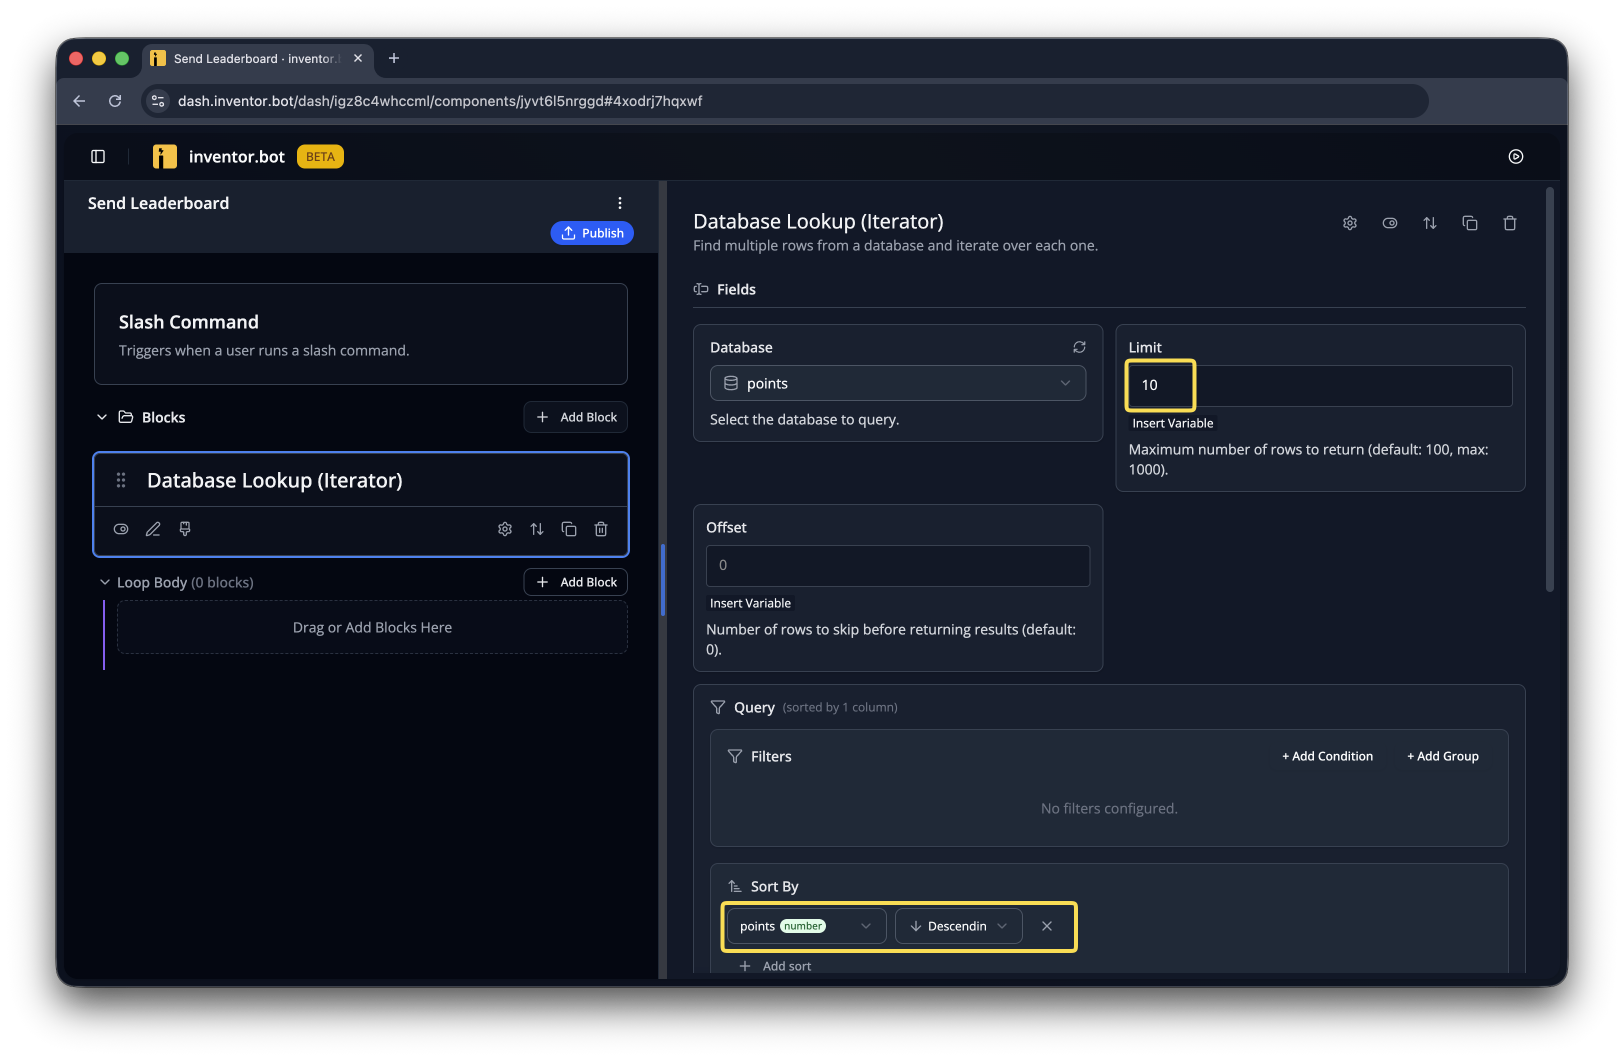
Add a Database Lookup (Iterator) block. Give it a limit of 10 (or anything else as long as you don't hit the message character limit!). Sort by the number column, (points, xp, money, etc.)
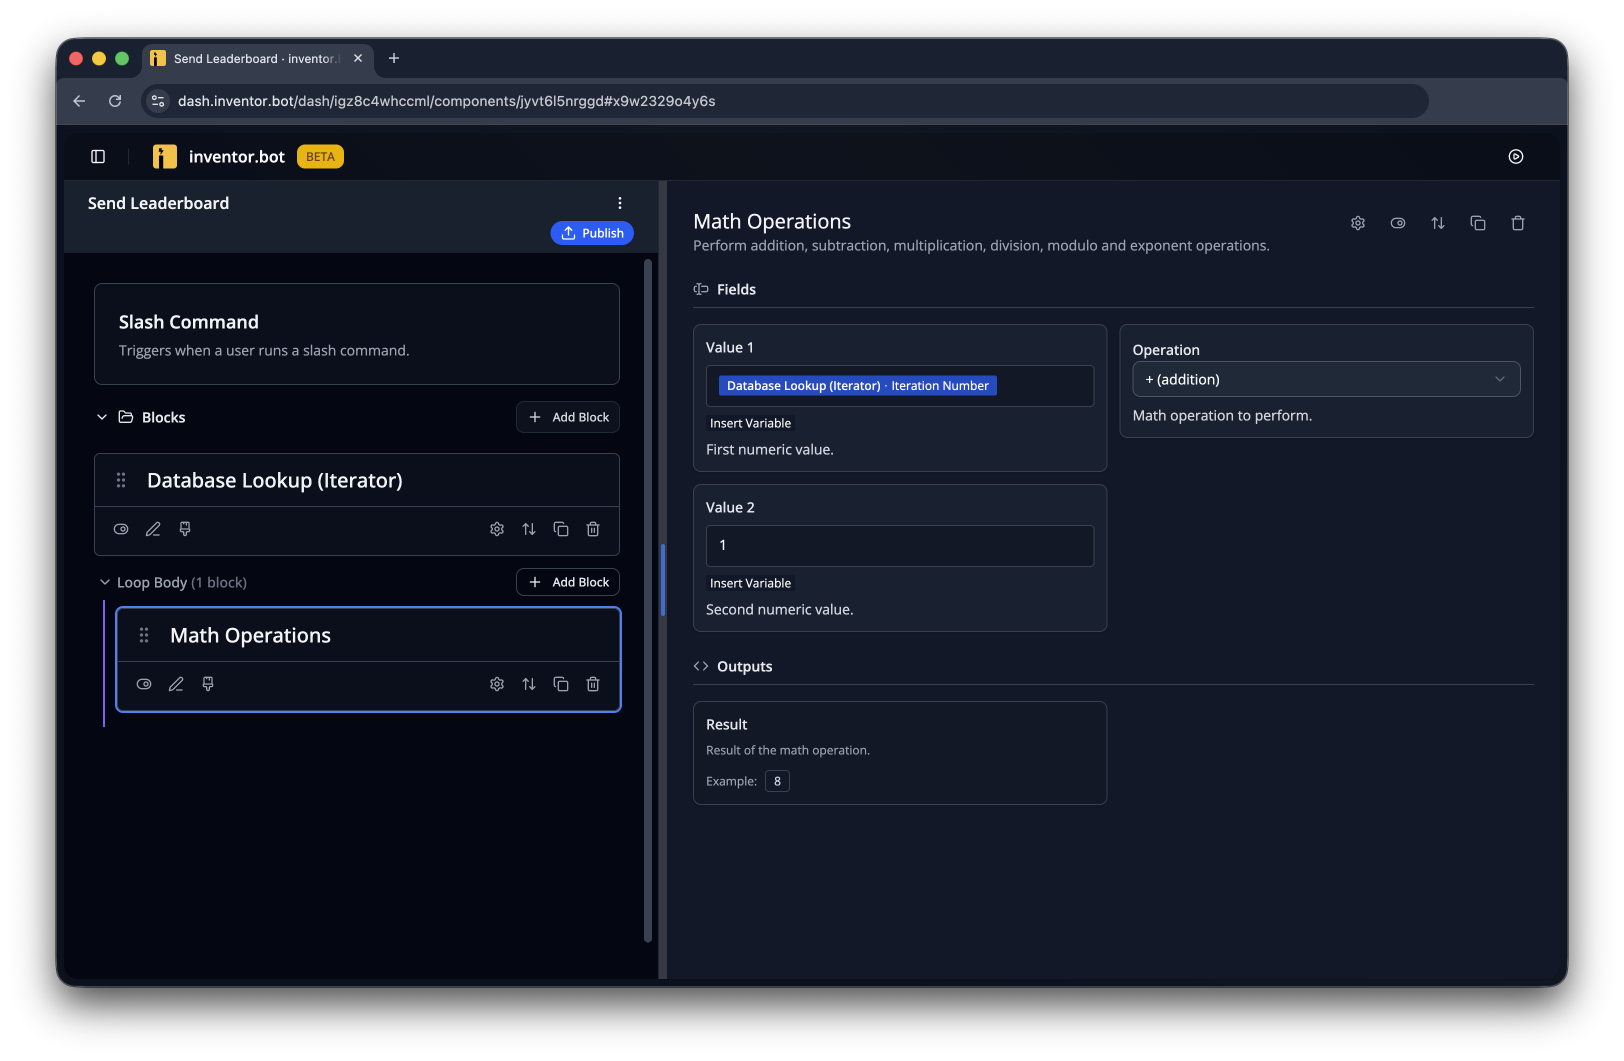
Iteration Number starts starts at 0, so we need to add 1 to it.
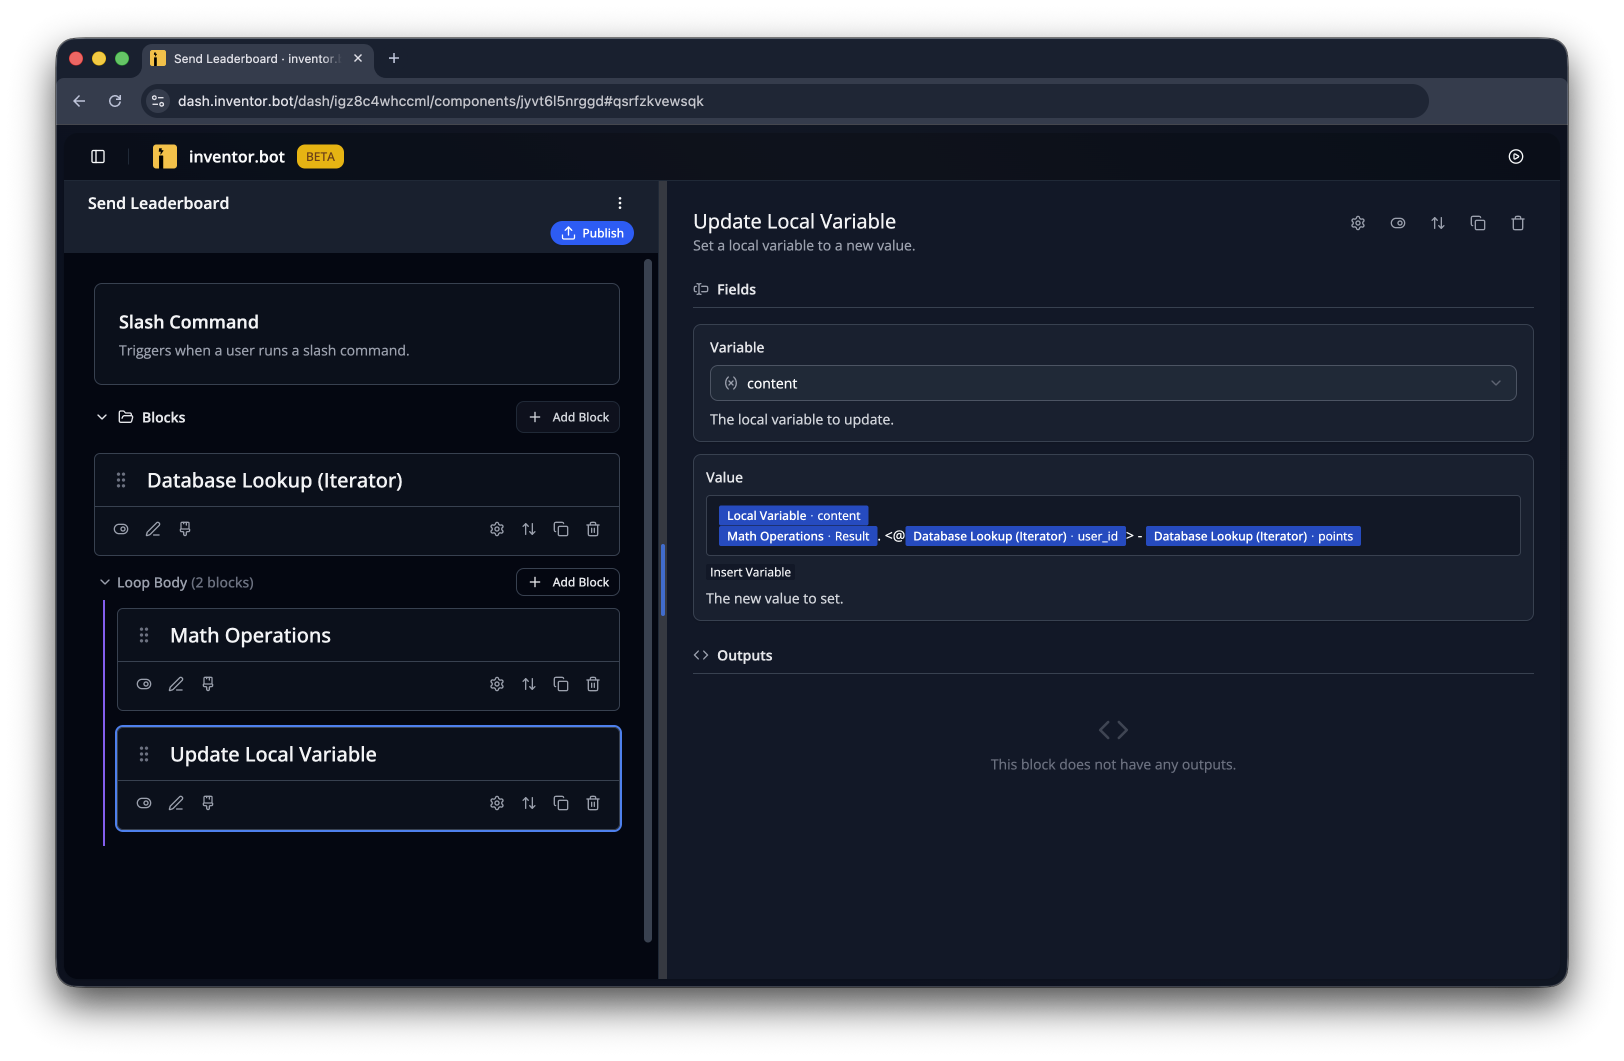
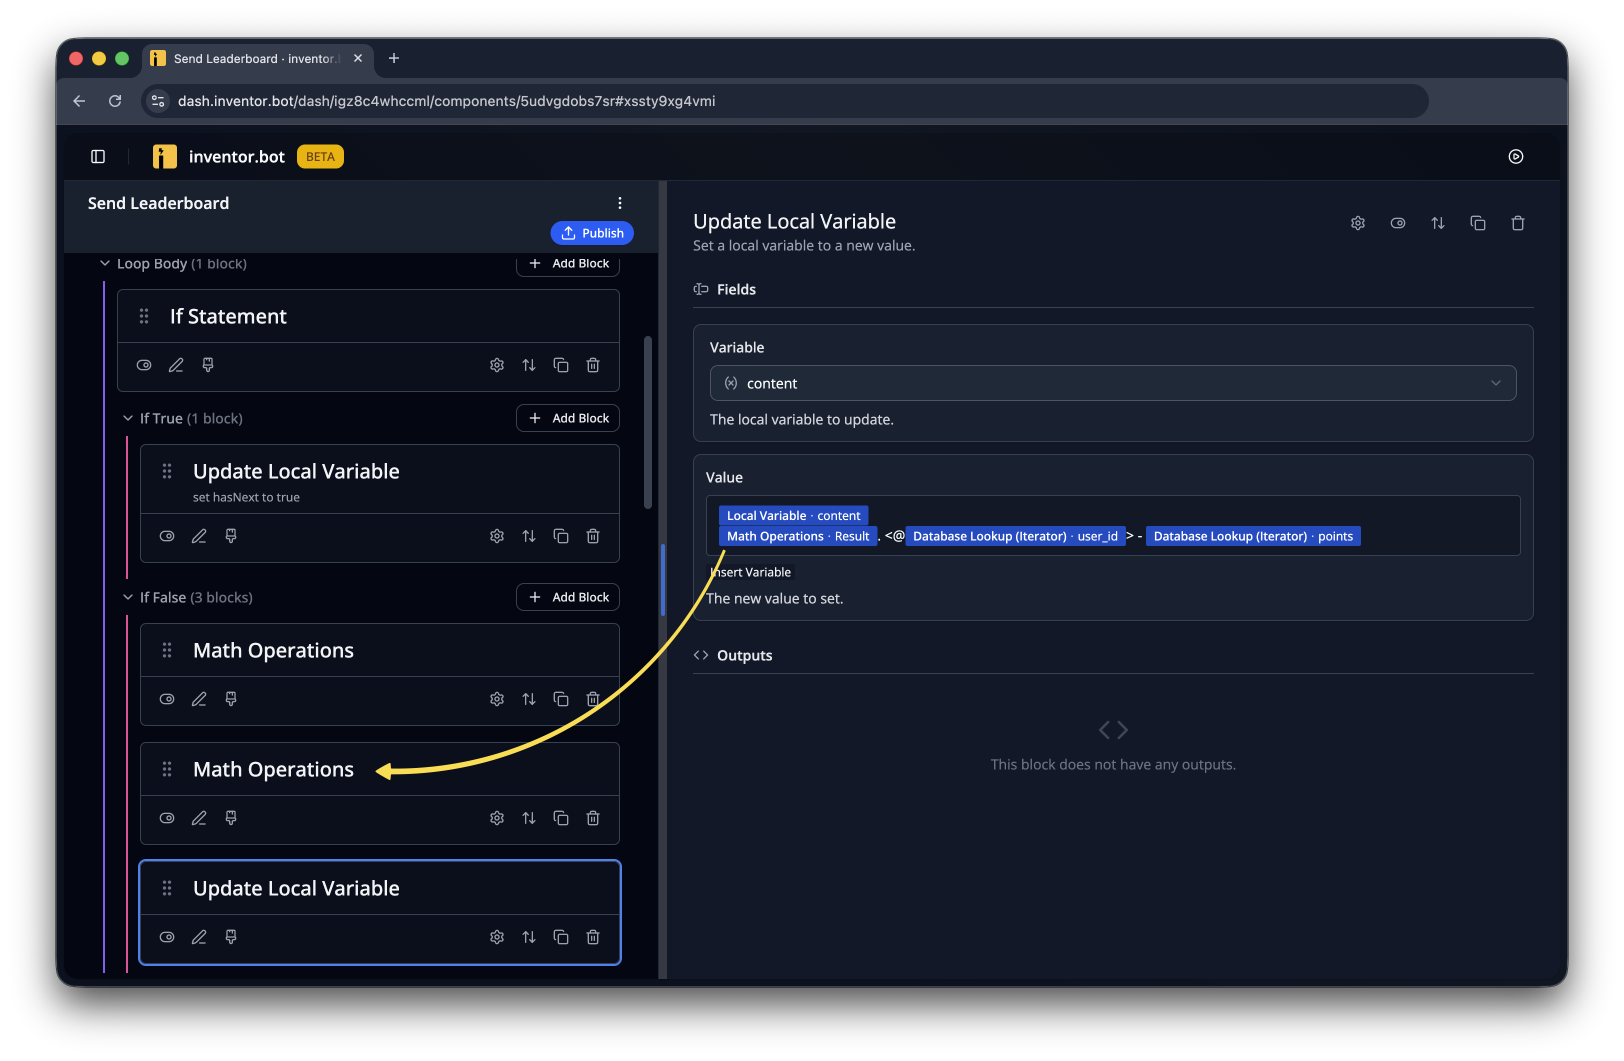
Add an Update Local Variable block to the iterator and add variables to compose what each row will look like. In this case, rows will look like "1. @user - 12345"
The content local variable now contains the leaderboard! You can send it however you'd like. In this example, we'll send it as an ephemeral reply to the user.
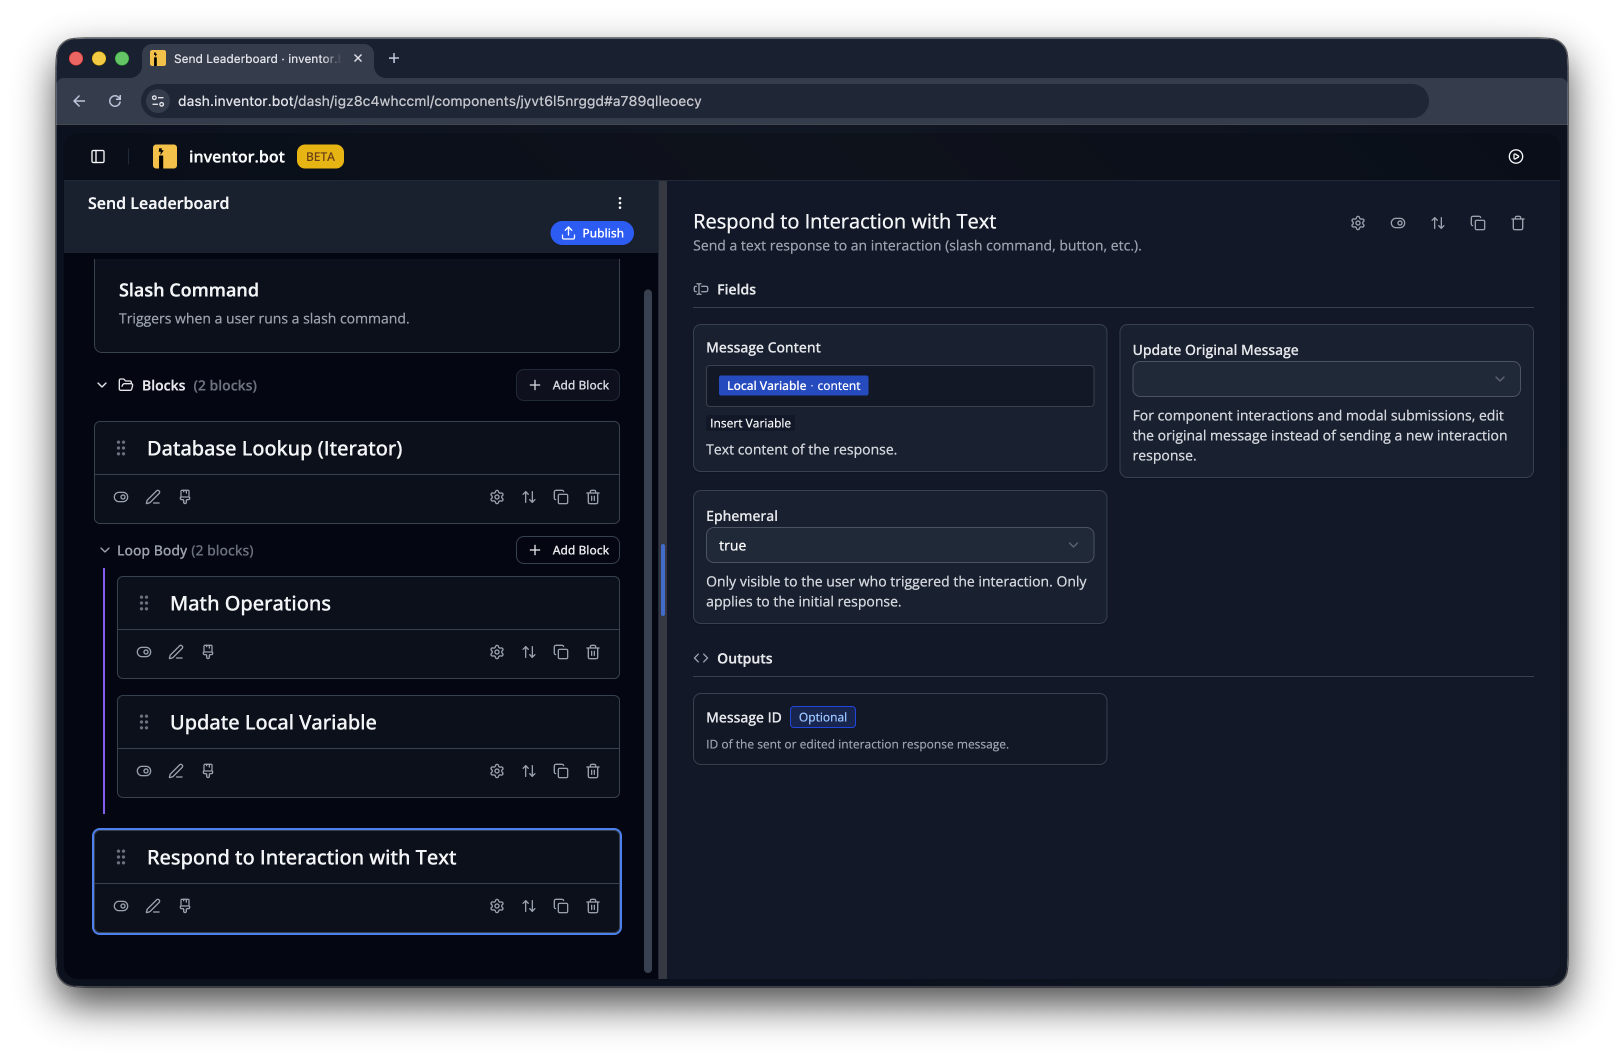
Note that, until Customize allowed mentions is added, you should keep the message ephemeral if it contains user mentions!
Make sure the command is published, then test it out!
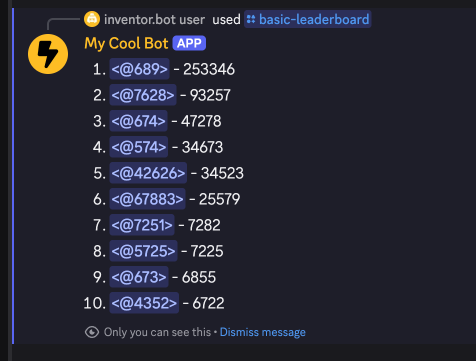
You now have a basic leaderboard system. Here are some ideas for improvements you could make!
- You could change it to a public leaderboard that automatically updates
- Change the trigger to Schedule and swap to a Send or Edit Text Message block.
- Wait for it to trigger once and send the message, then copy the message ID and put it into the Edit Message ID field.
- Try using an Embed Message or Advanced Message for a fancier message!
- Let the user control the Offset input of the Database Lookup (Iterator) block with a slash command option!
- If you do this, make sure to handle cases where the user's offset returns no rows!
- Add nicer number formatting with the Format Number block
Adding Pagination
If you want paginated leaderboard messages, you can follow this guide instead:
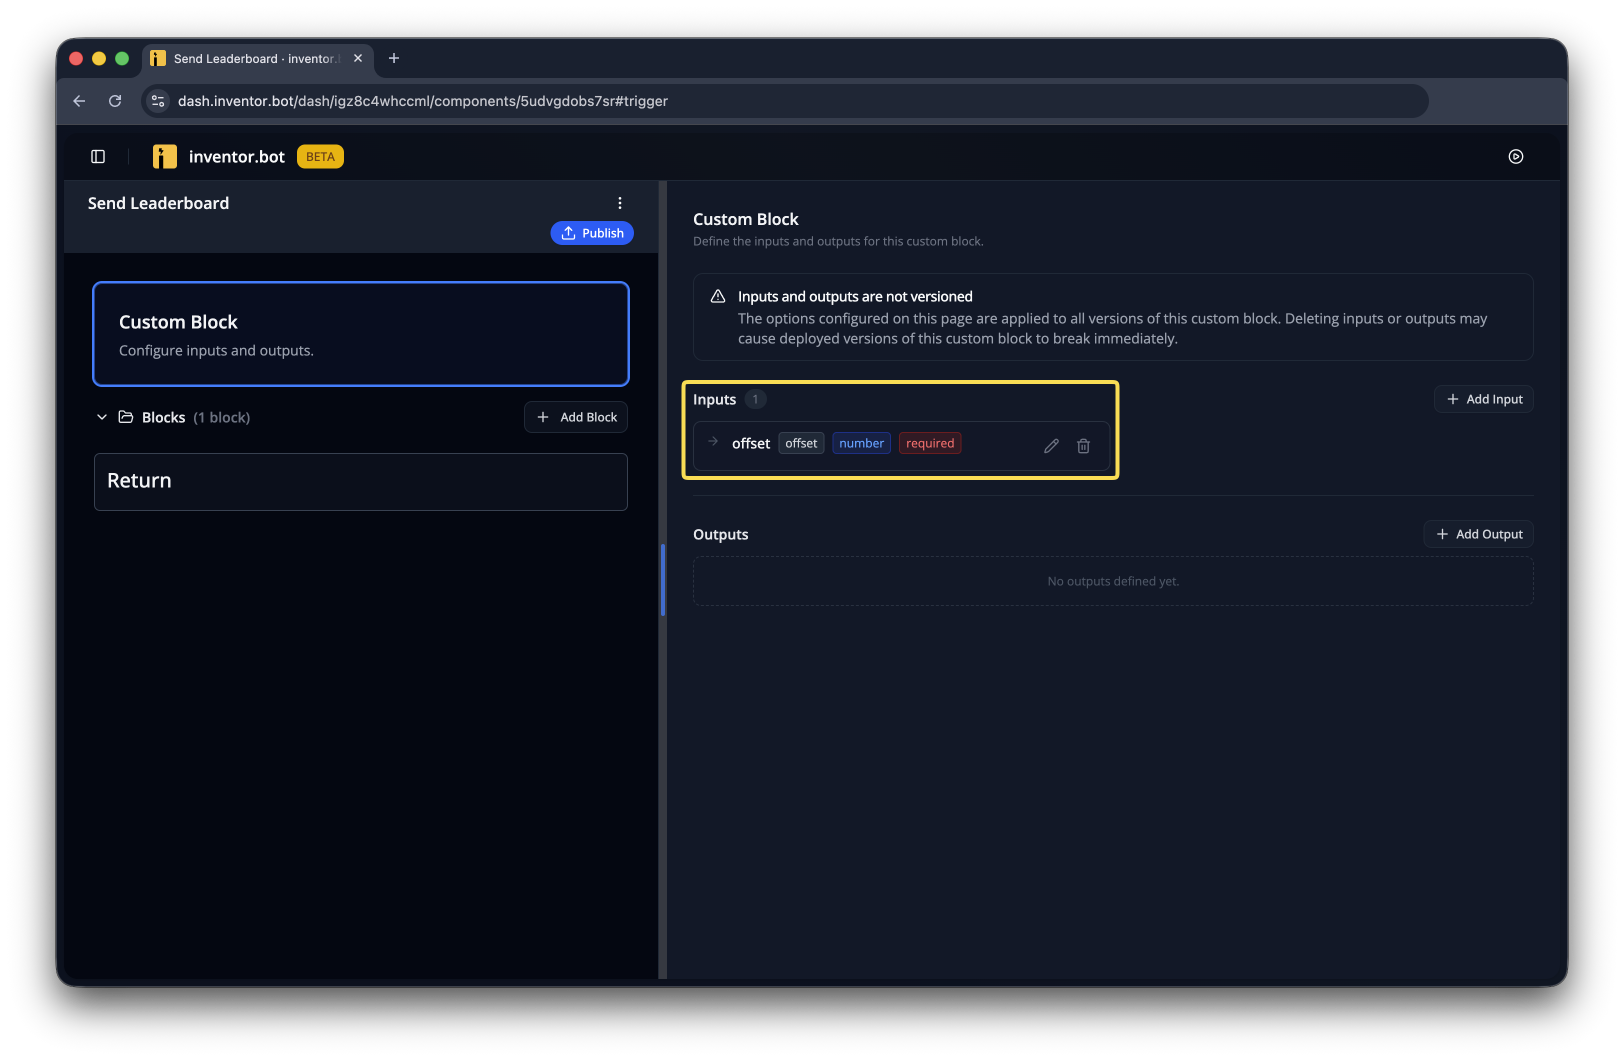
Since we need to reuse logic in two components, we'll make a custom block. It'll need an offset input.
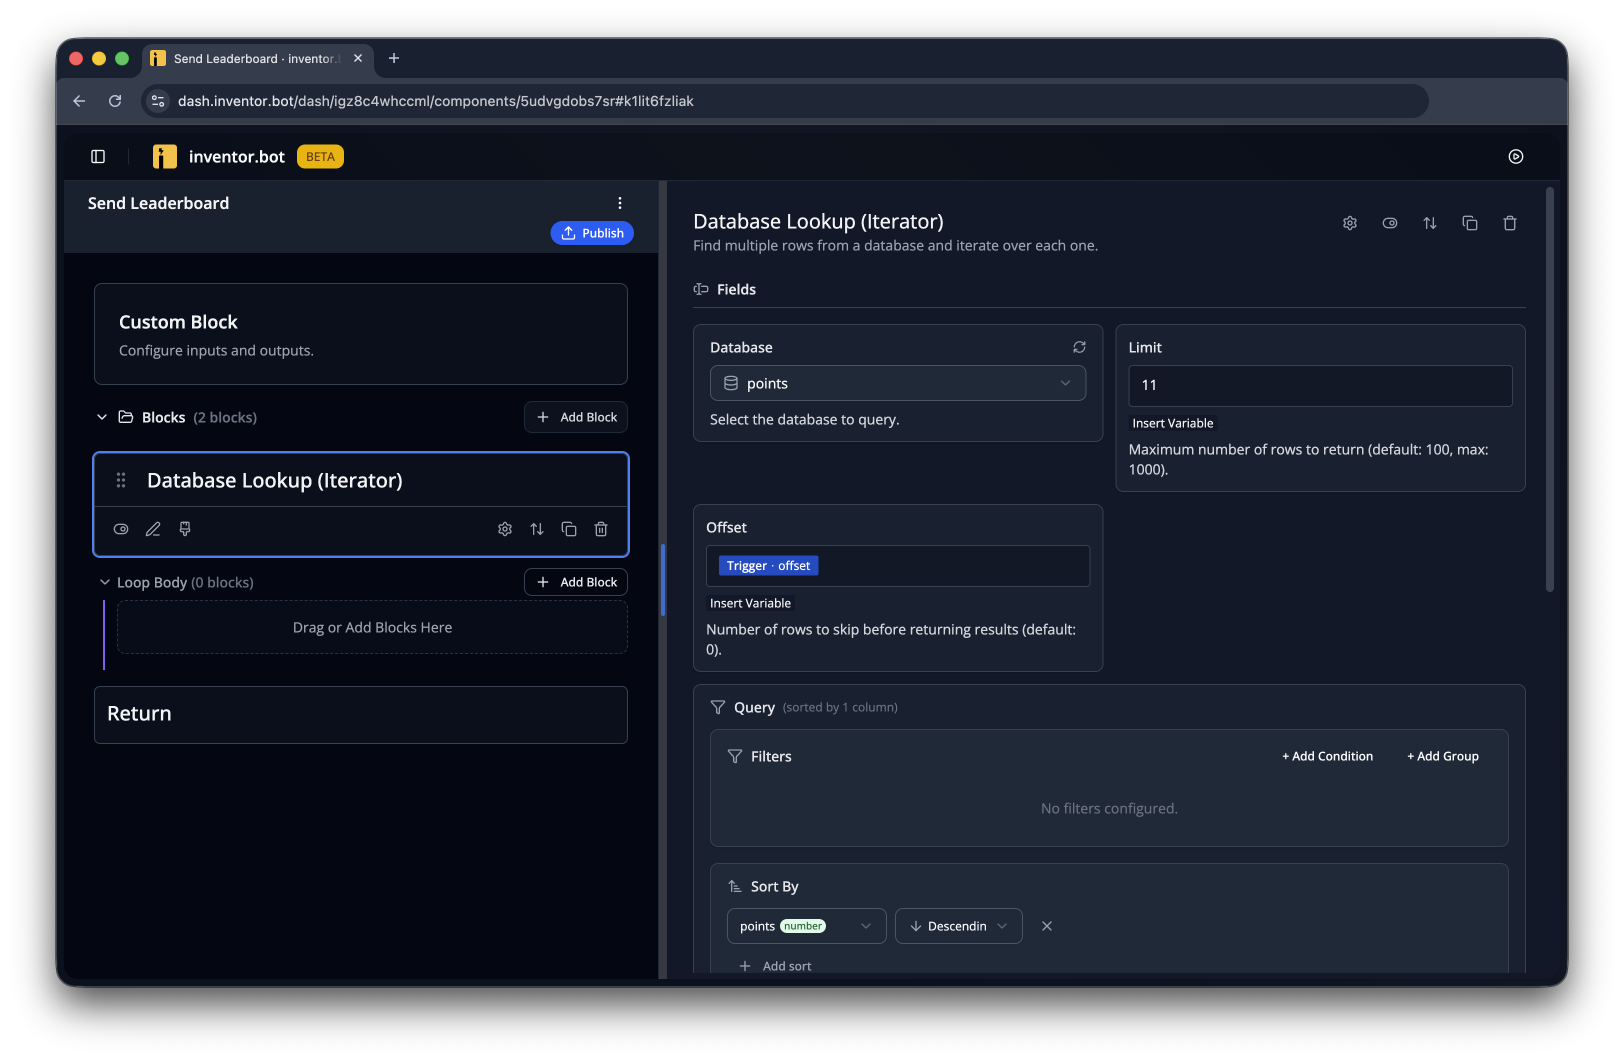
Now lets add a Database Lookup (Iterator) block with a Sort By and the Offset from the trigger. We'll also set the Limit to the number of rows you want per page plus one.
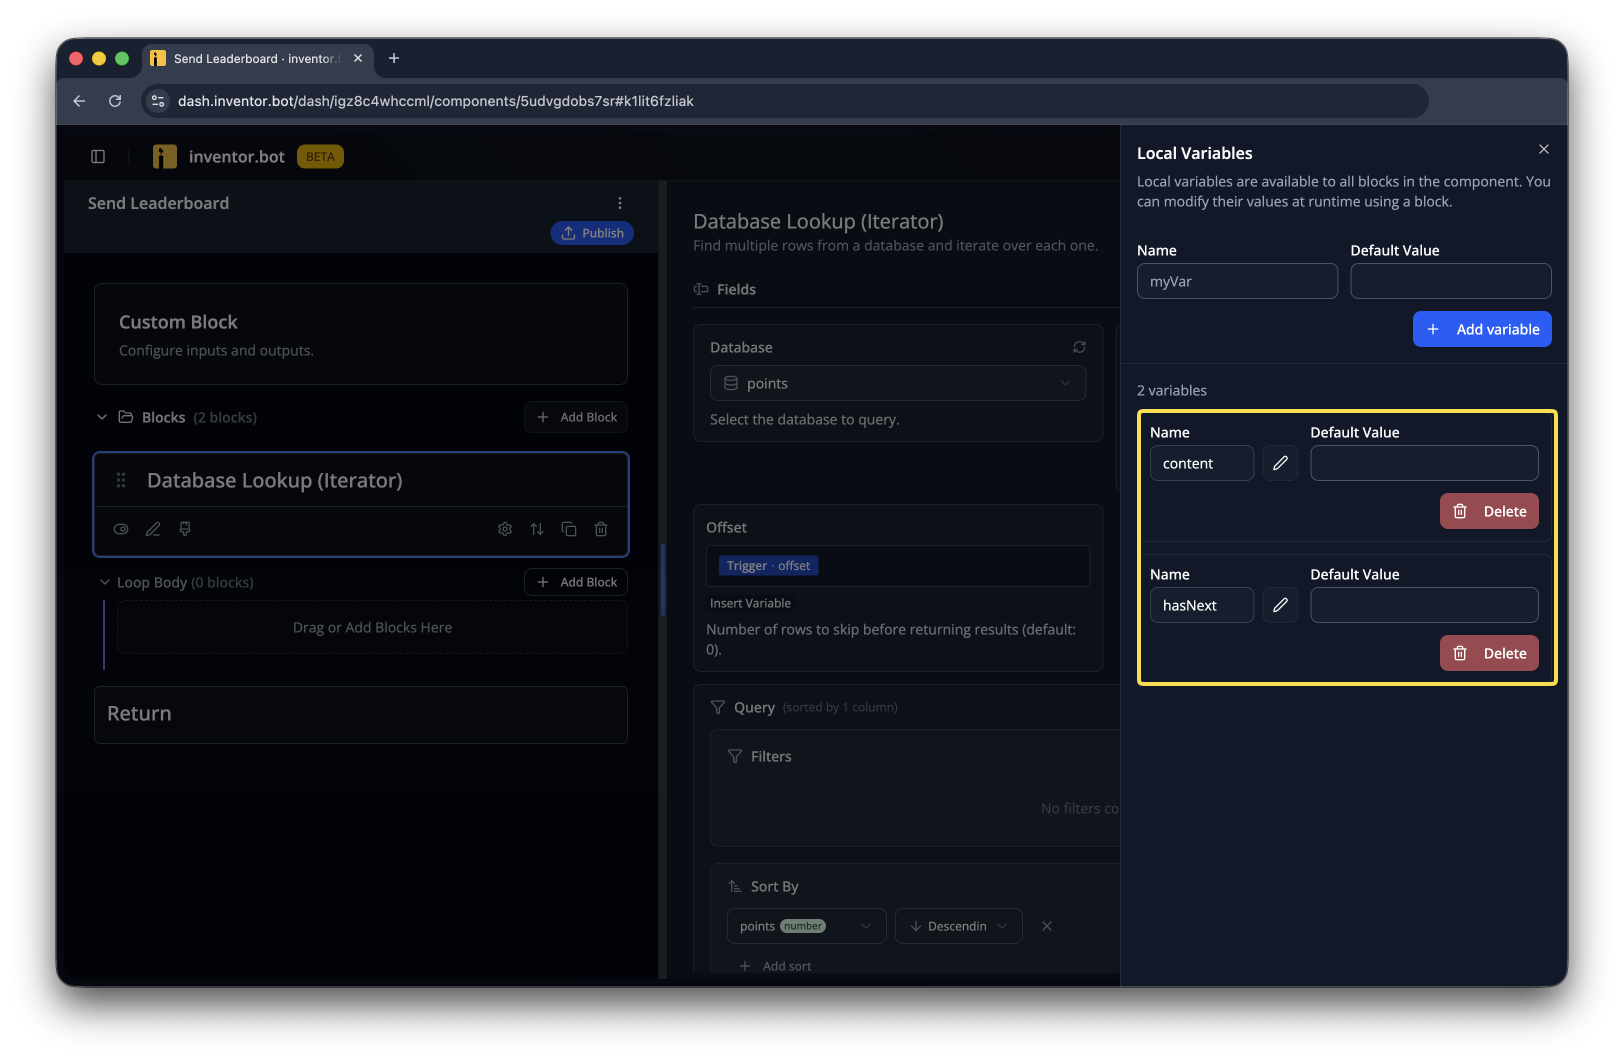
We need to add a few local variables- content and hasNext. Both should have a blank default value.
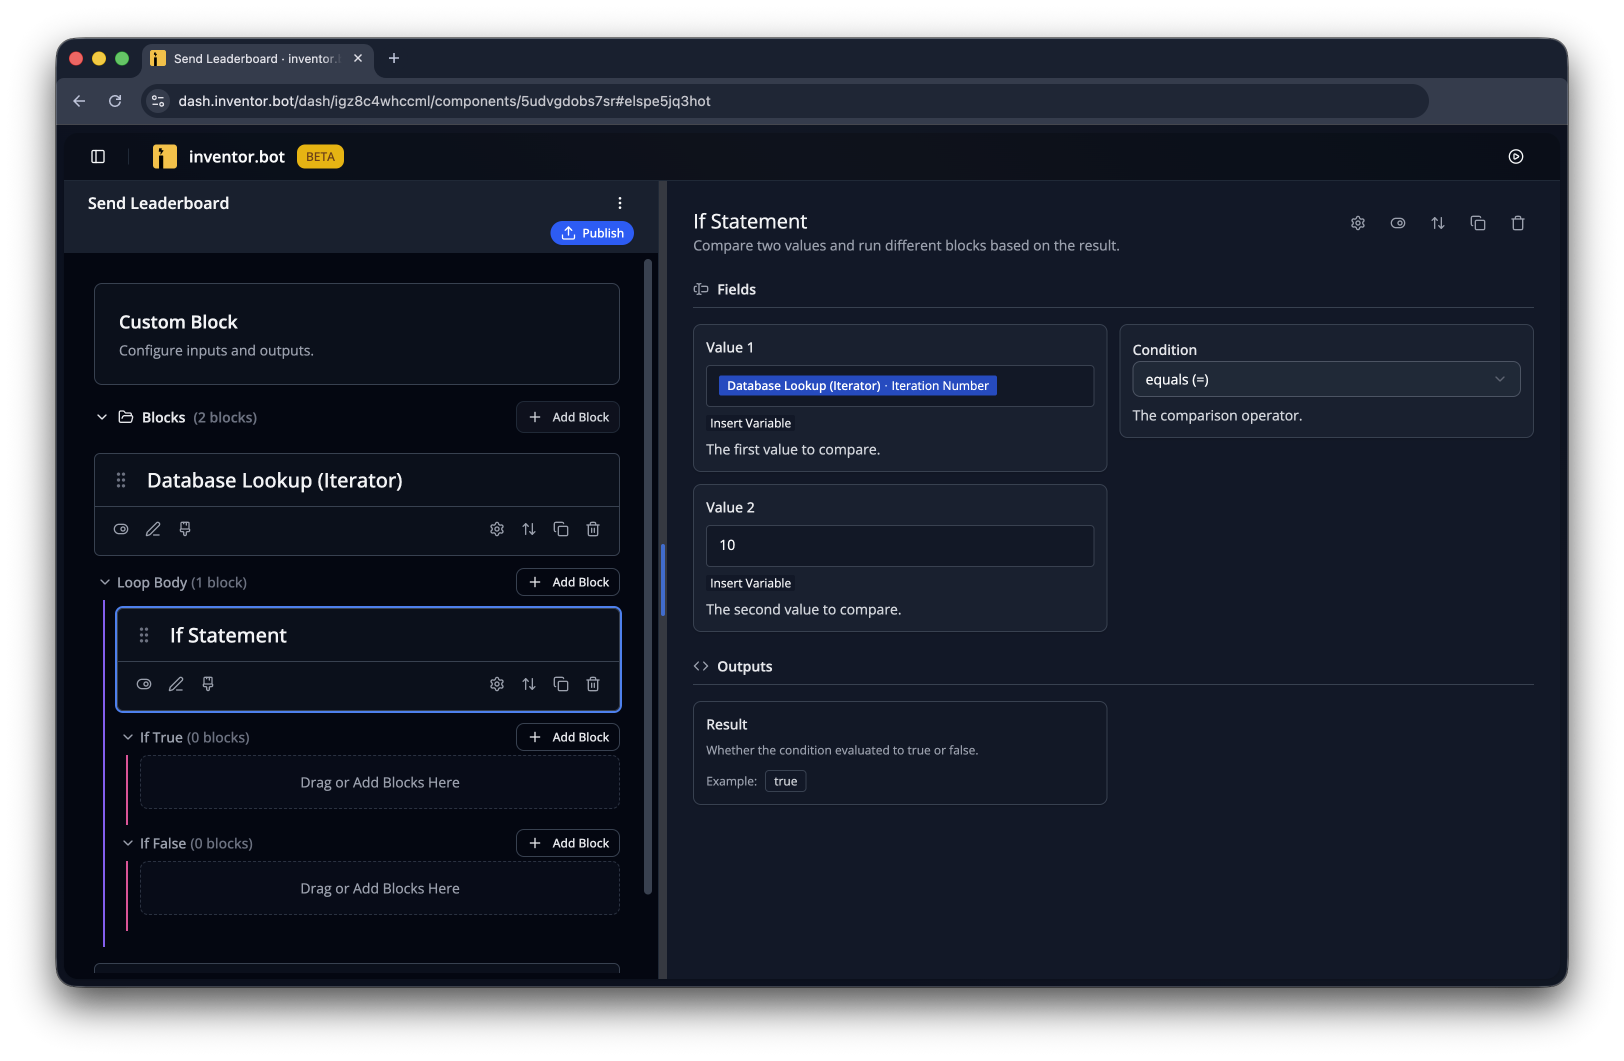
We'll add an If Statement that checks if this is the extra row that we don't need.
If it is that extra row, we'll use Update Local Variable to set hasNext to true.
Why do we track
hasNext?We want to disable the Next button if there aren't any more rows, so even though we only display 10 rows, we ask the database for 11. If it returns 11, we know that there's at least one more row that we can display on the next page, so we can enable the Next button. If it returns 10 or less, we leave it disabled since there aren't any more rows.
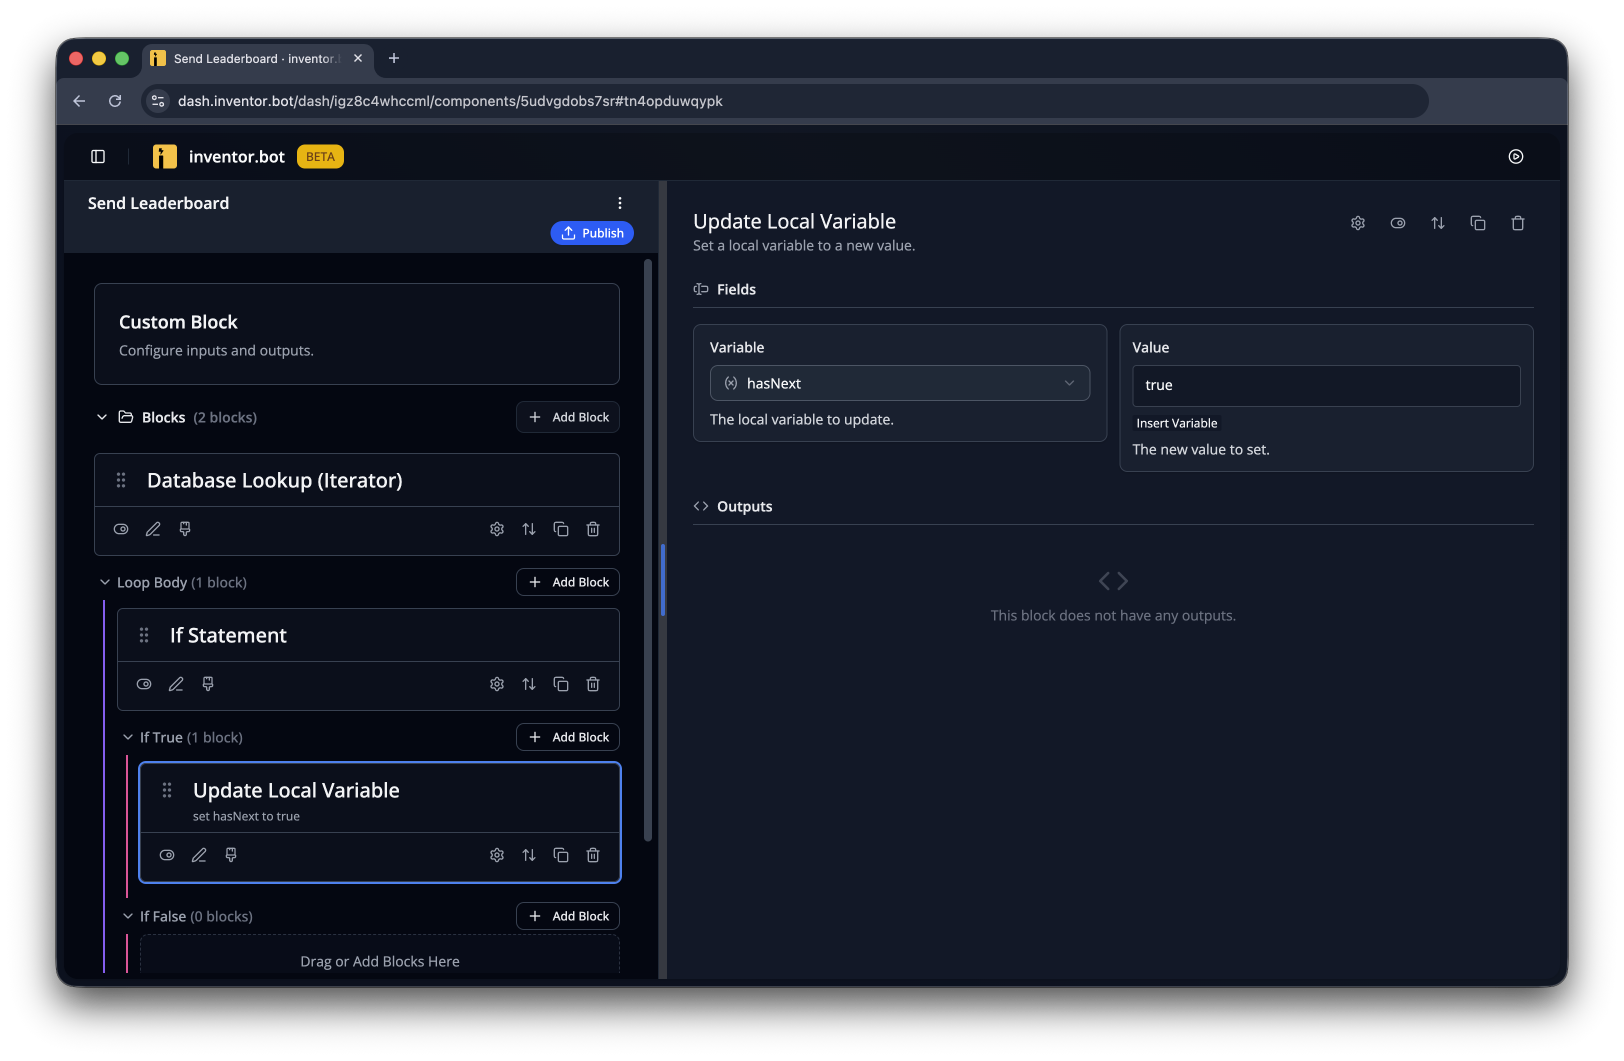
If it's not the last row, we need to figure out what place this row is in. We'll add the offset and the current Iteration Number.
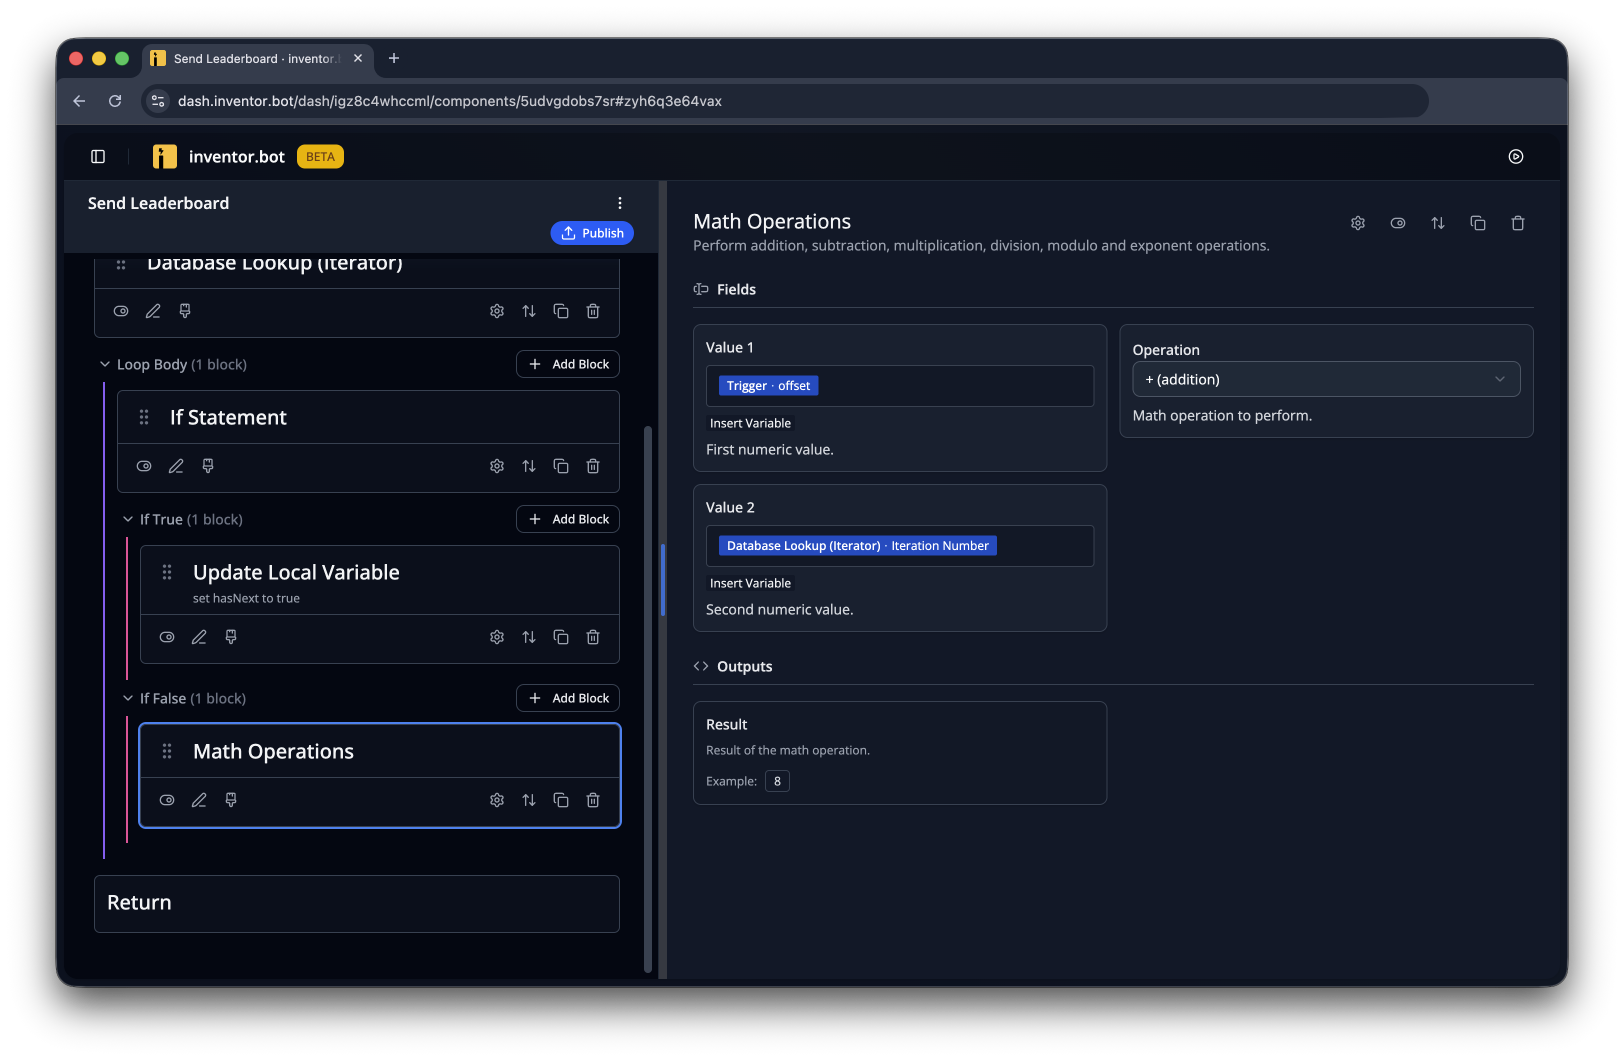
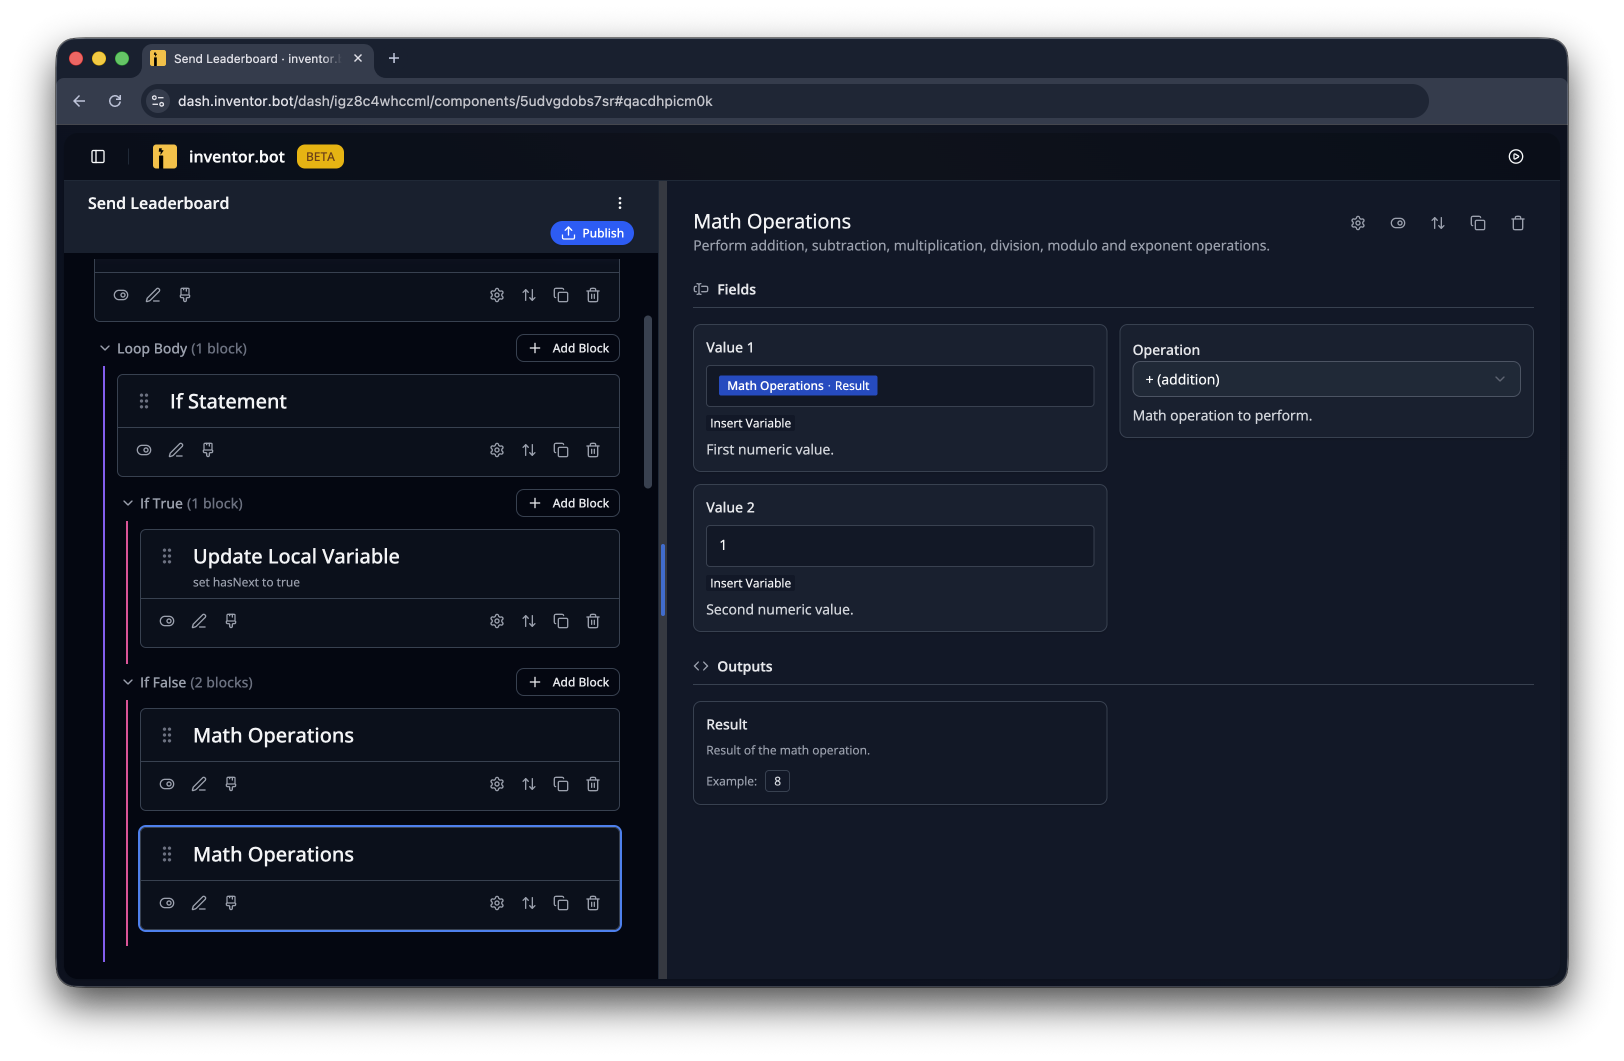
We also need to add one more, since Iteration Number starts counting at 0 (but we want the leaderboard to start at 1!)
Now we'll update the content variable to add the row. Make sure to use the variable from the last Math Operations block!
Great, that's the leaderboard content finished! Let's add a Respond to Interaction with Advanced Message block. Update Original Message and Ephemeral should both be true!
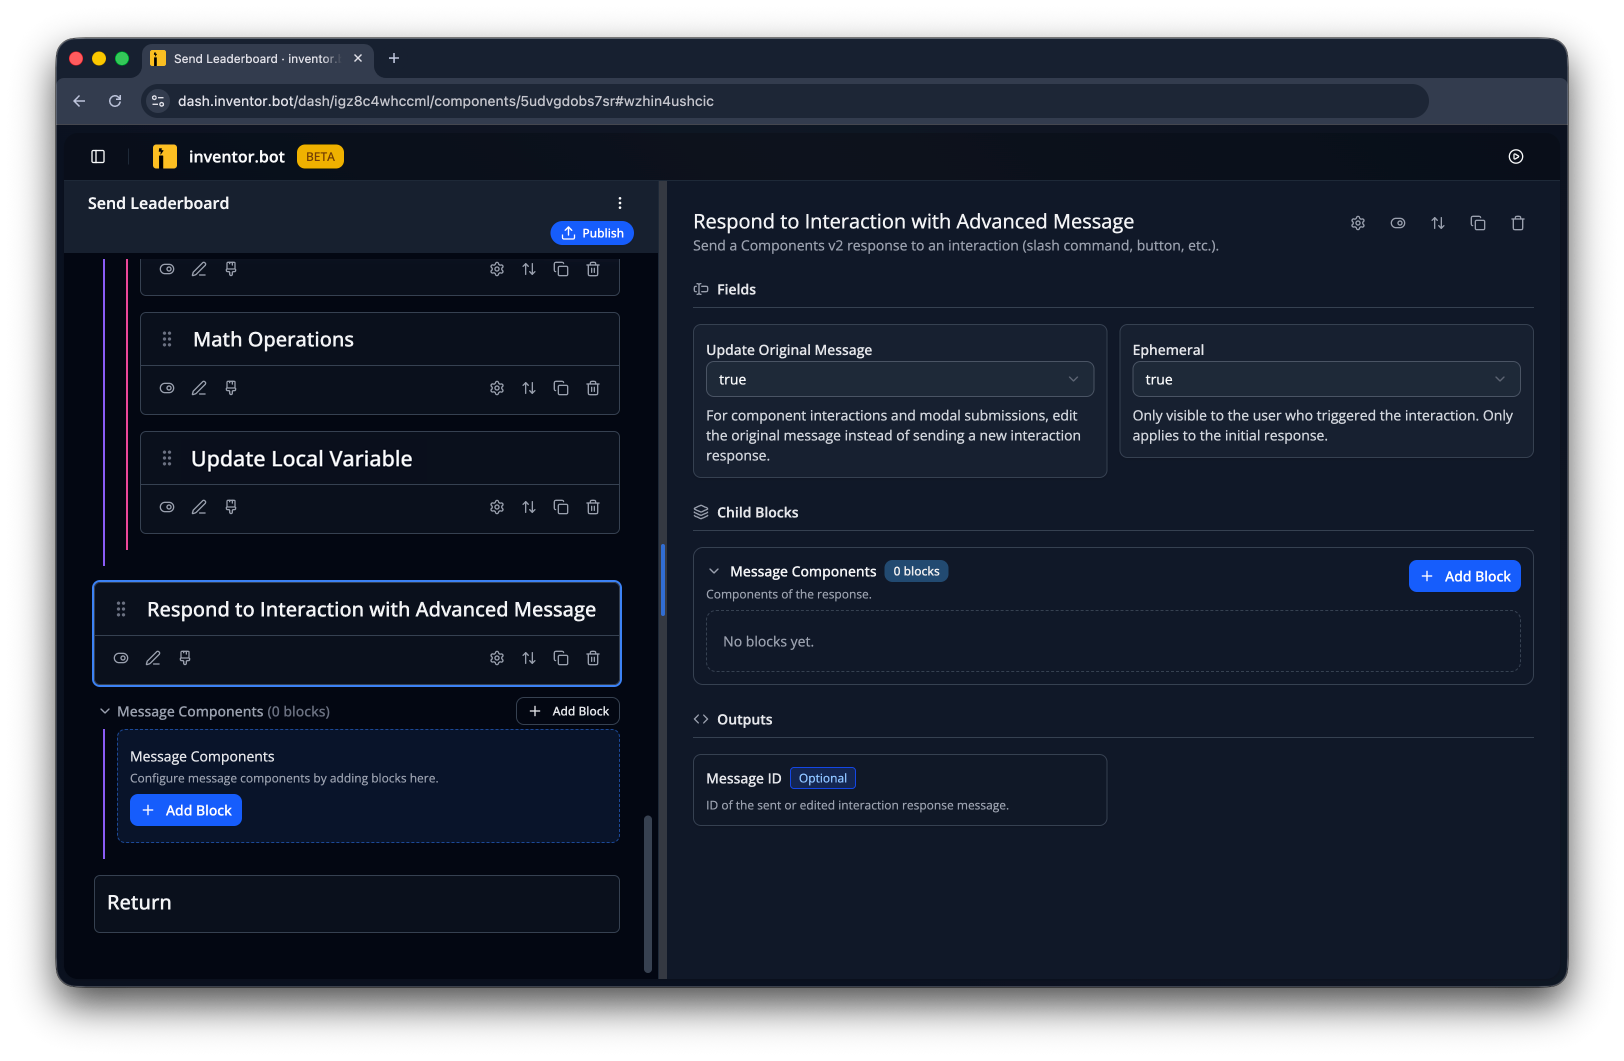
We'll add a Message Container, then Text inside of it. That'll be our content variable.
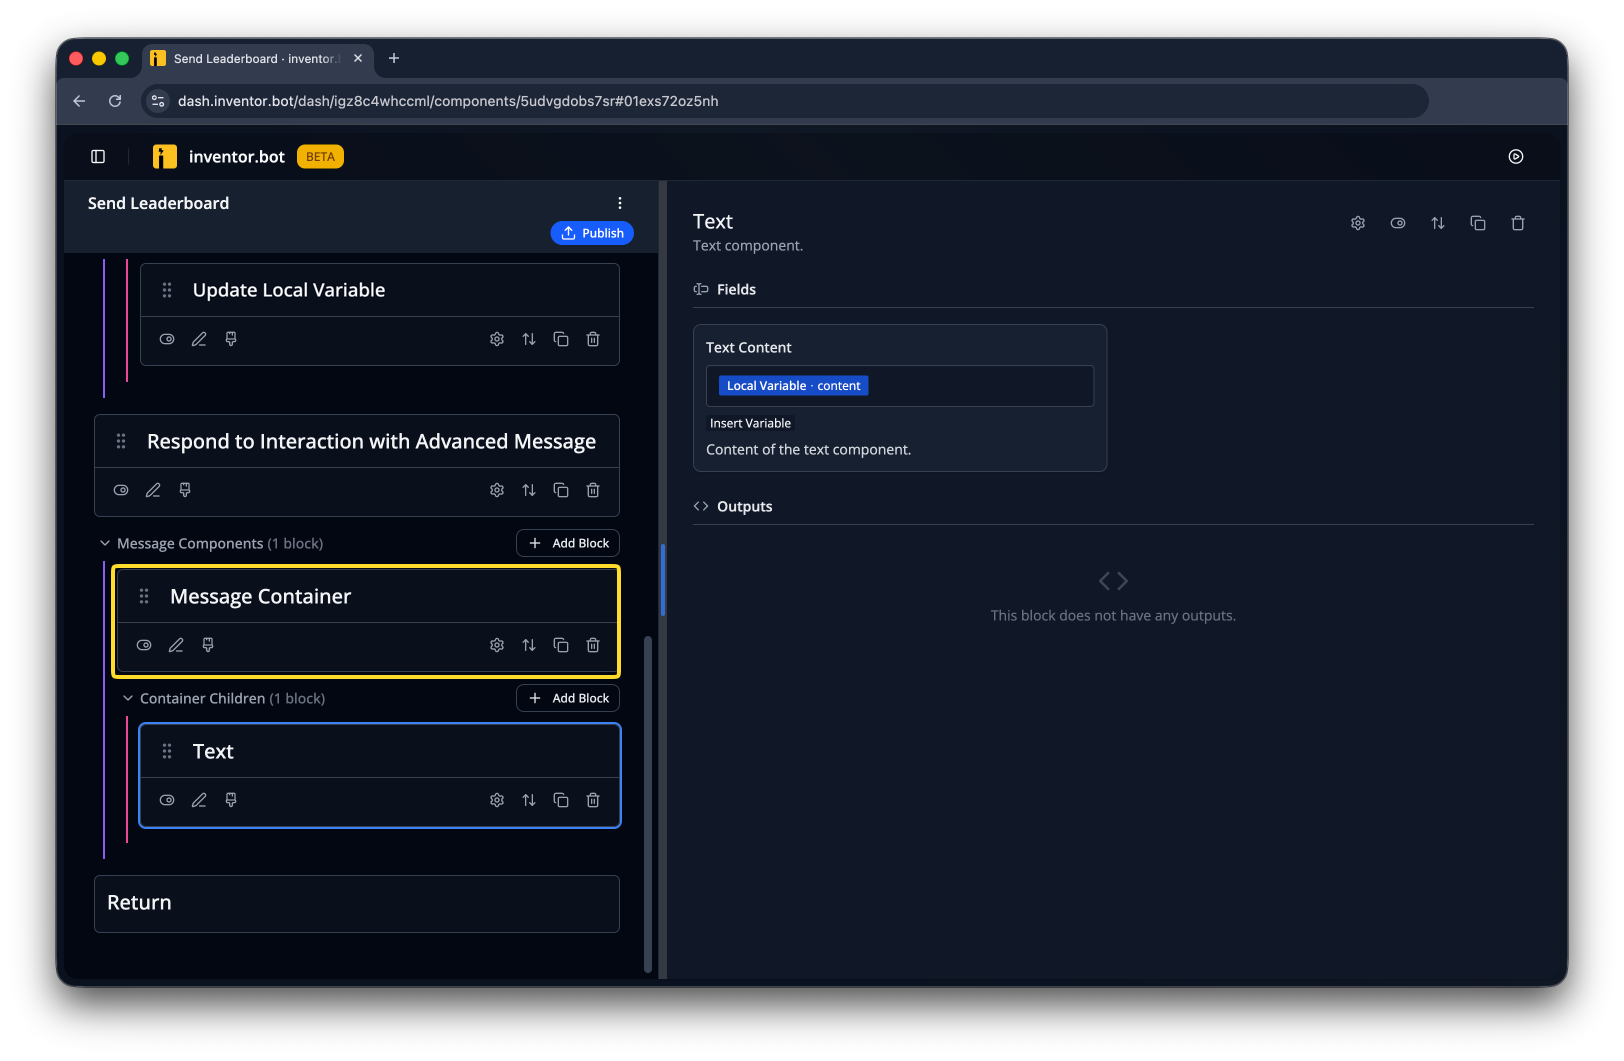
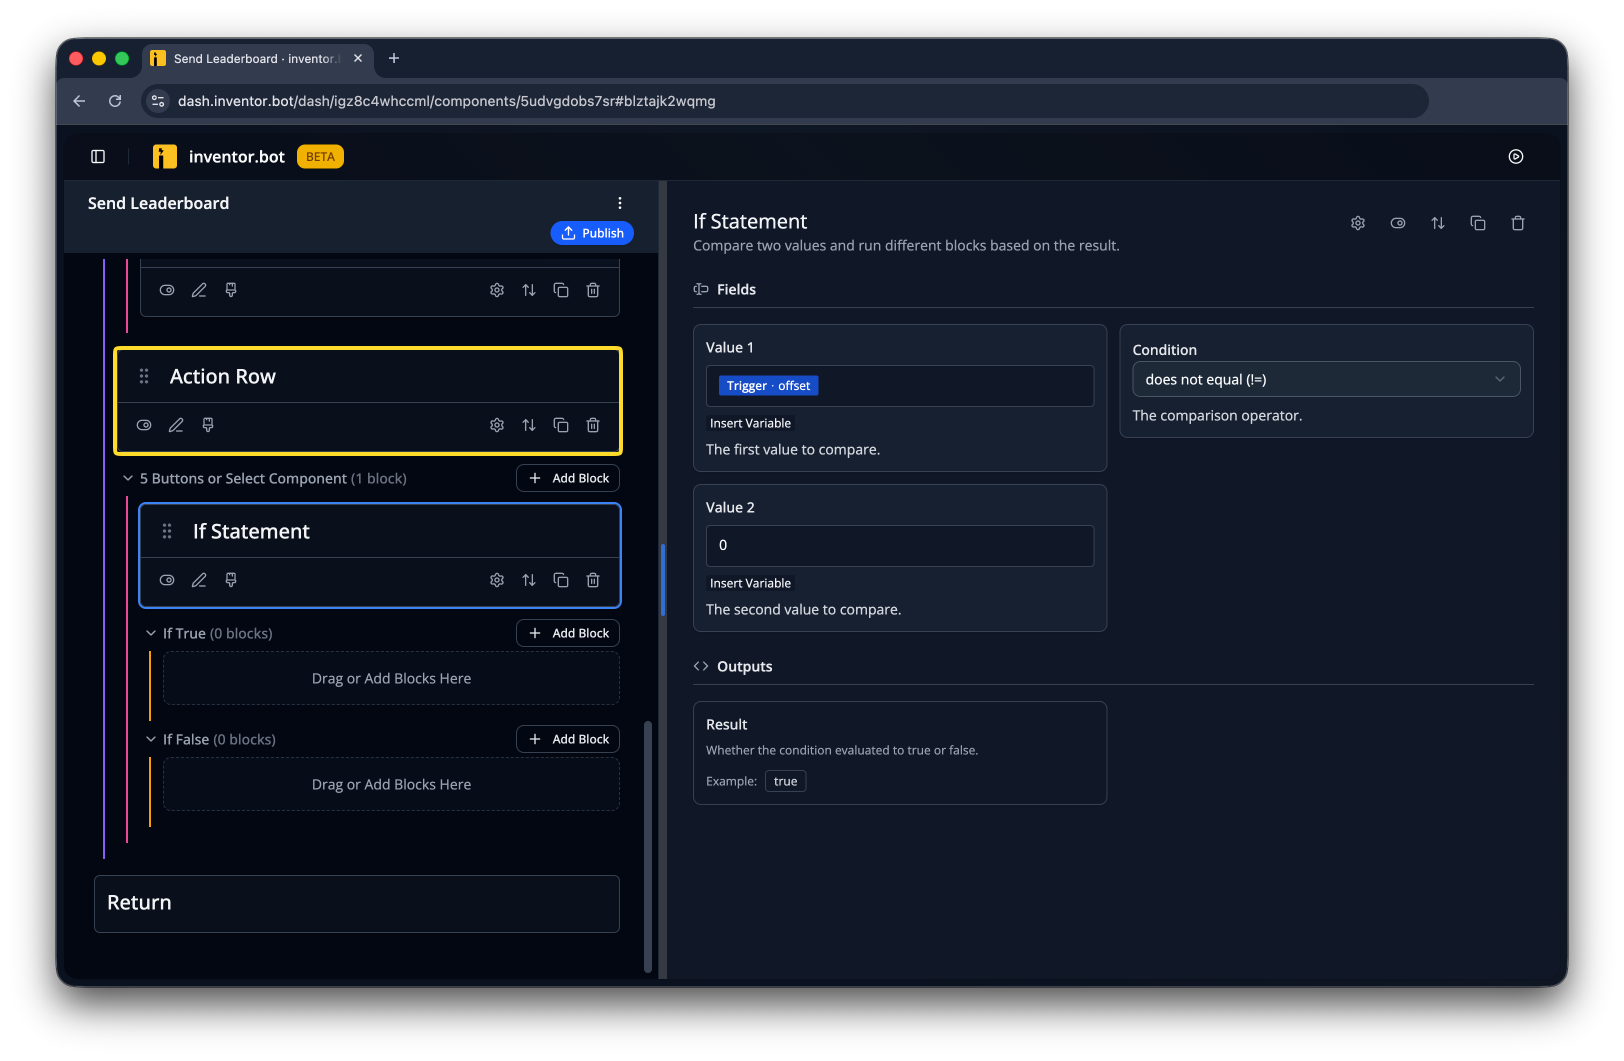
Now we'll add an Action Row with an If Statement inside. We'll check if the offset doesn't equal 0.
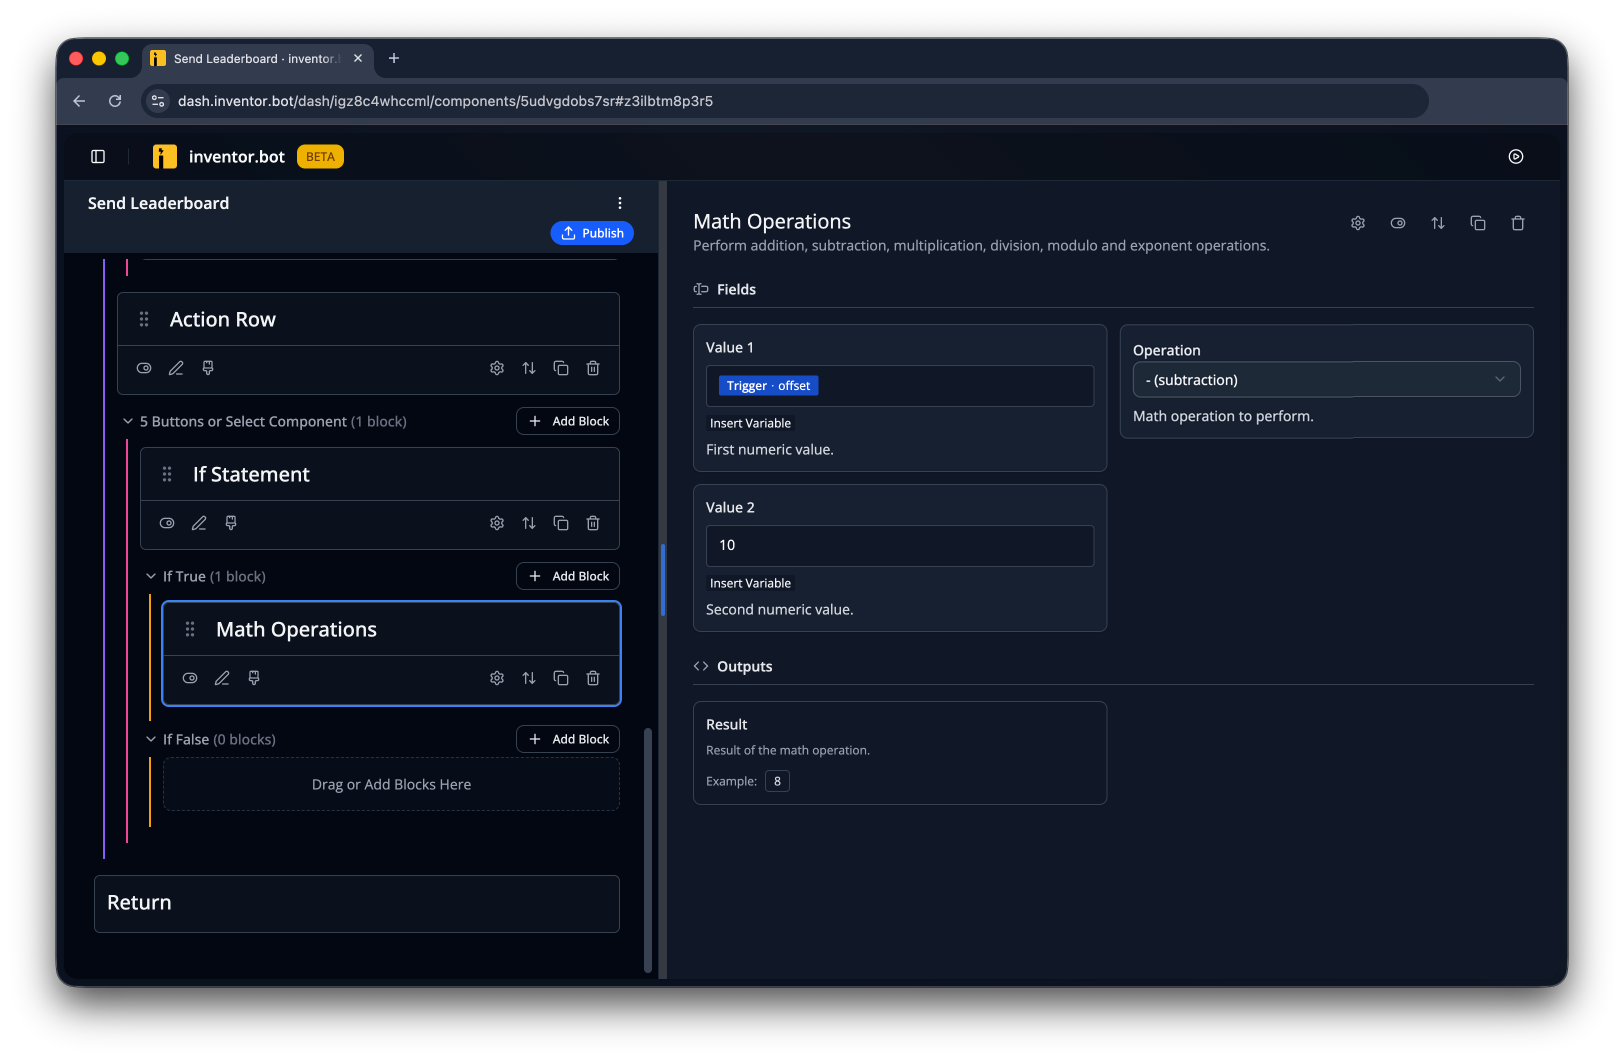
In If True, we'll subtract the number of rows per page from the current offset to figure out the offset of the previous page.
Now add the button:
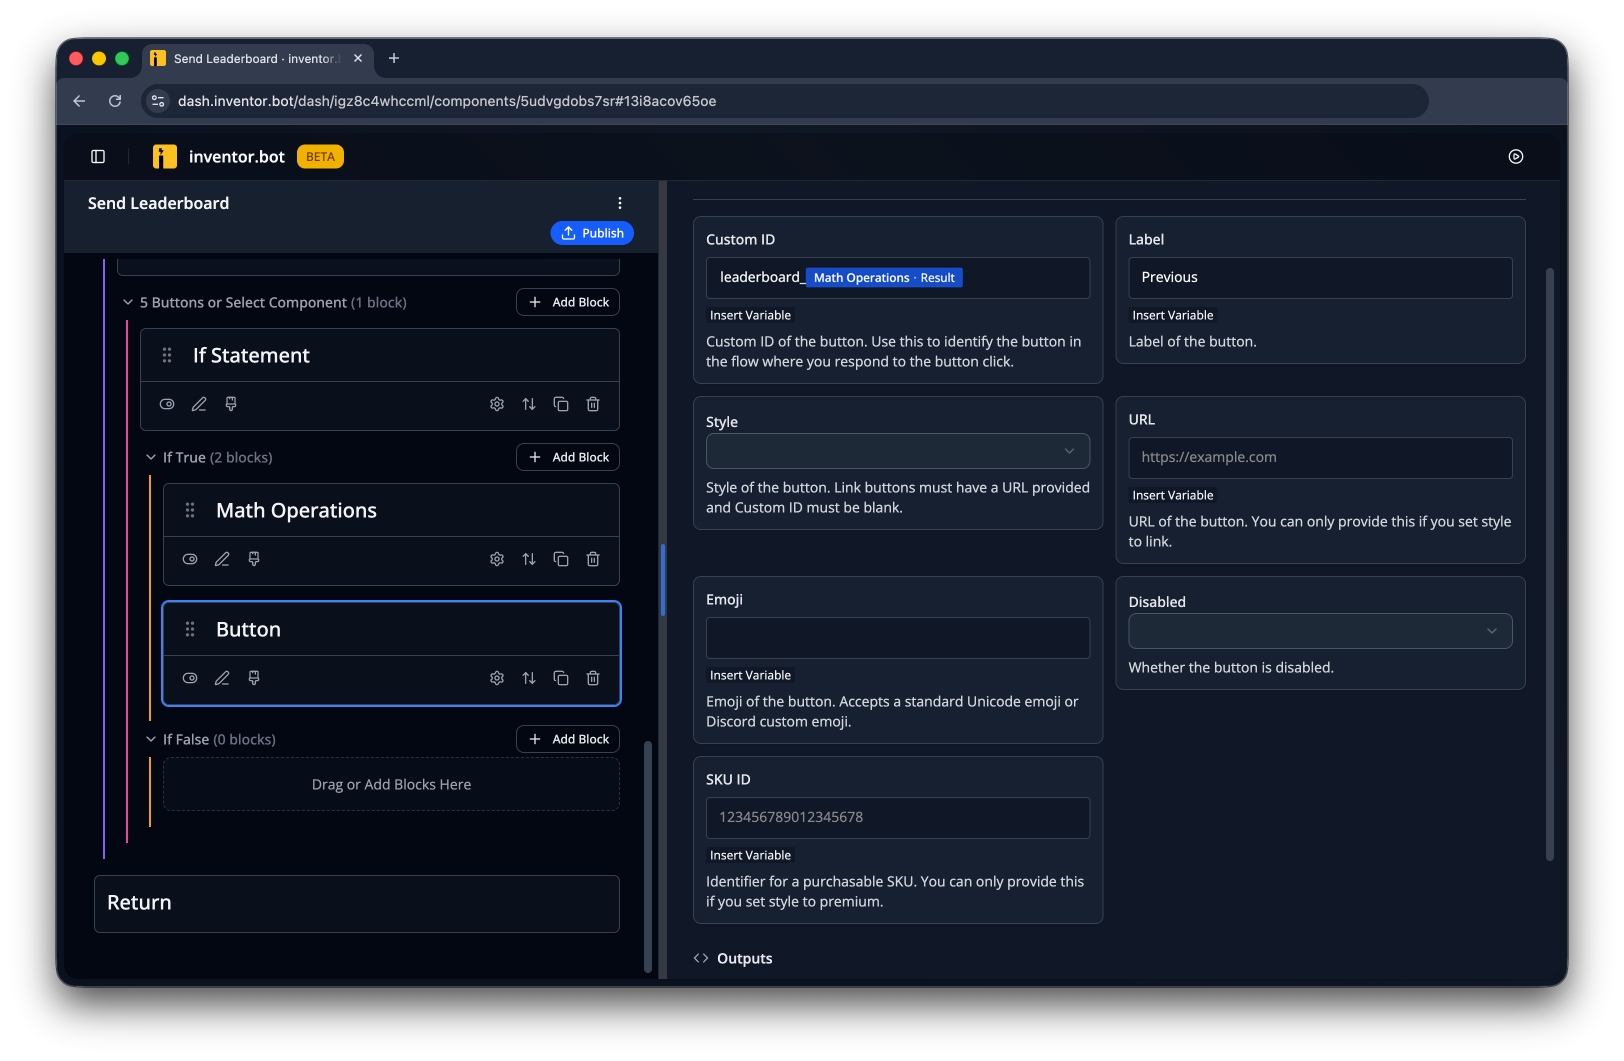
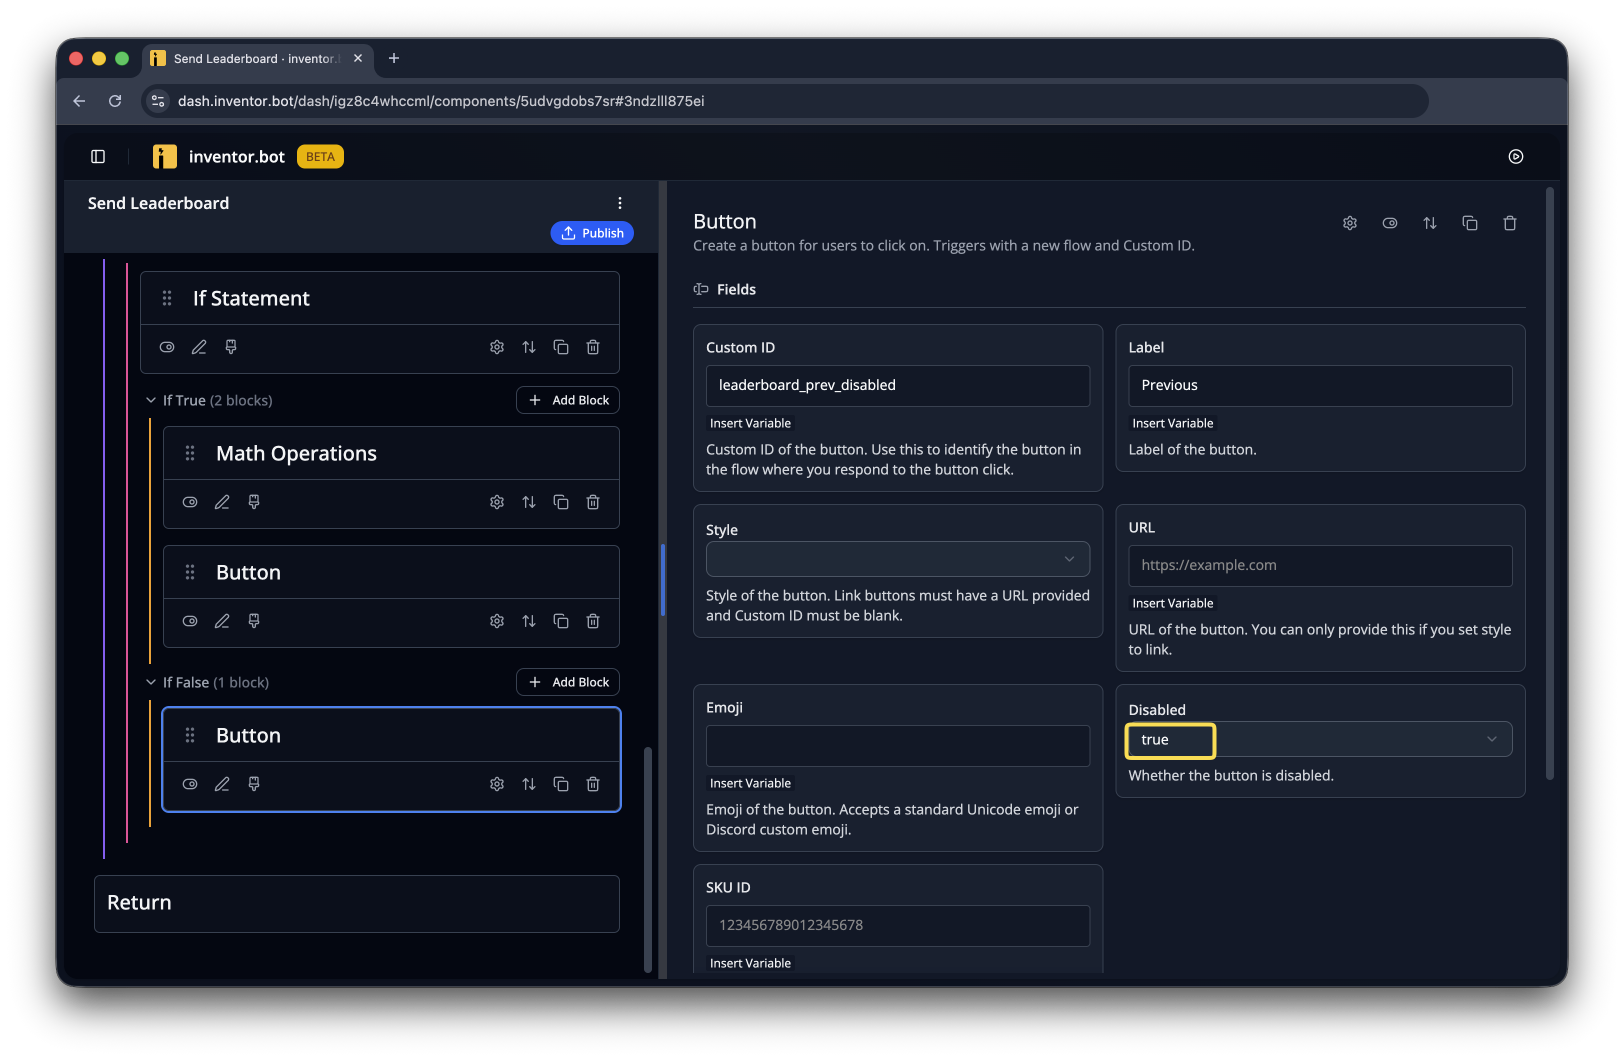
Now we'll add the disabled button. It still needs an ID, so we'll put in something random. Make sure to mark it as Disabled! If you want the buttons to disappear when they're disabled, you can skip this.
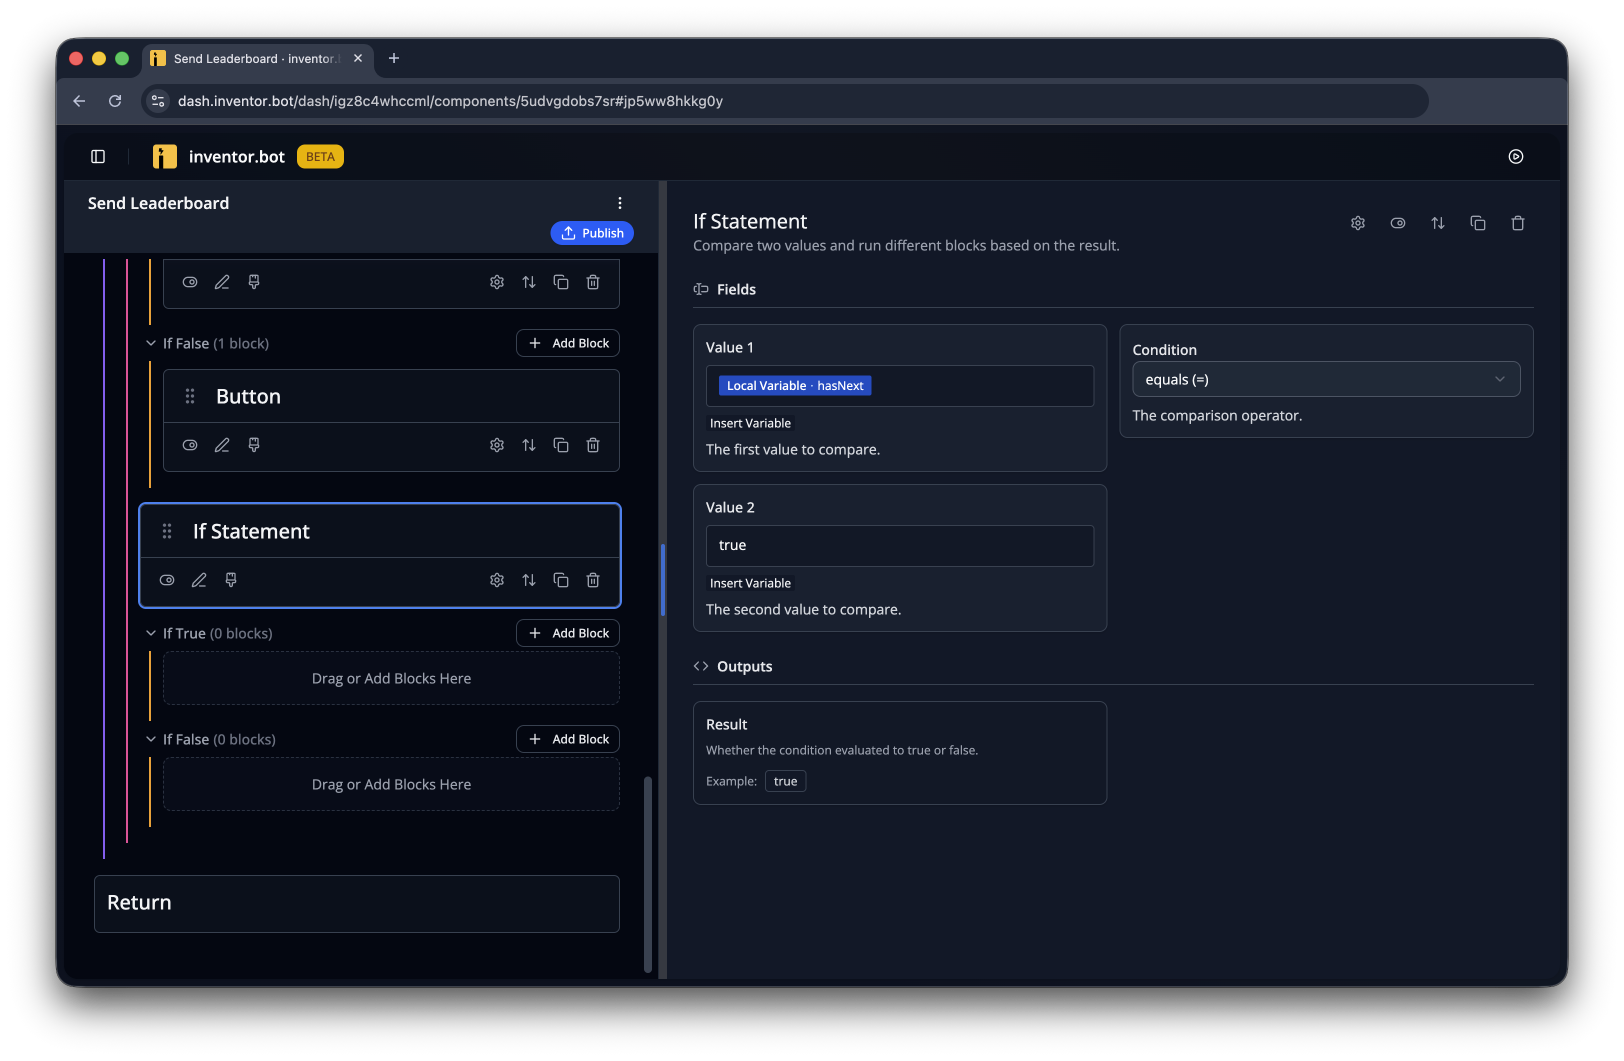
Now we'll do something similar for the Next button. Add another If Statement, this time checking if hasNext is true.
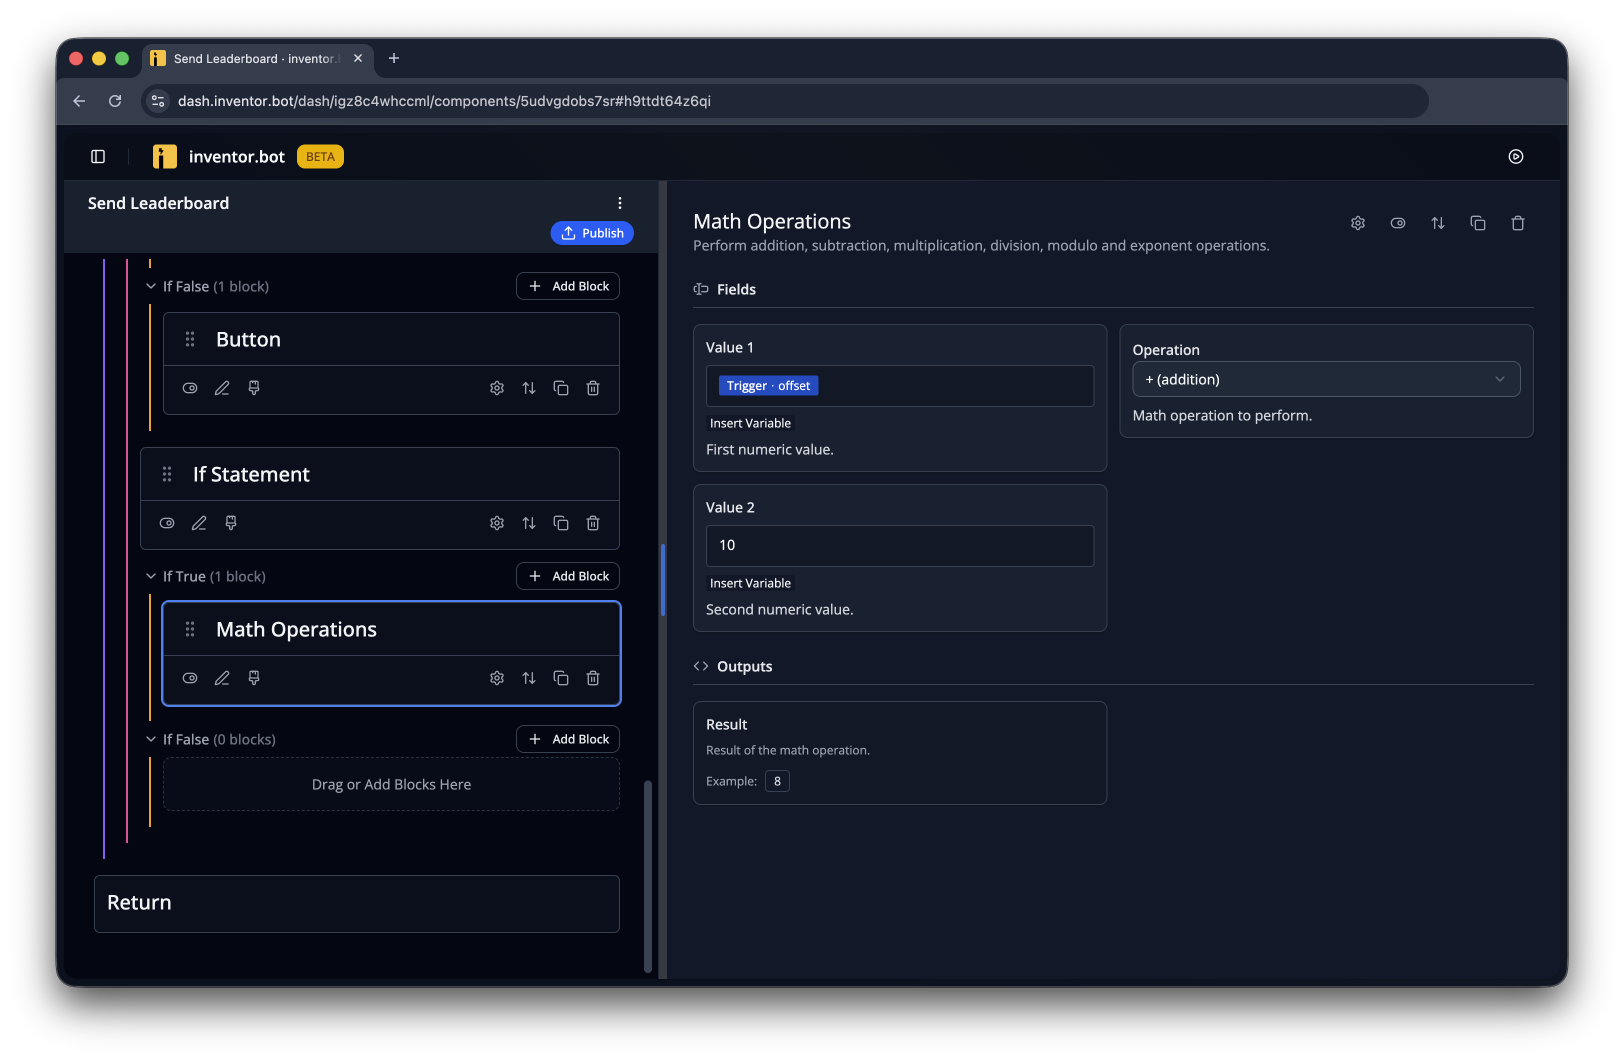
If True, we'll find the next page's offset by adding 10 to the current offset.
Now add the button:
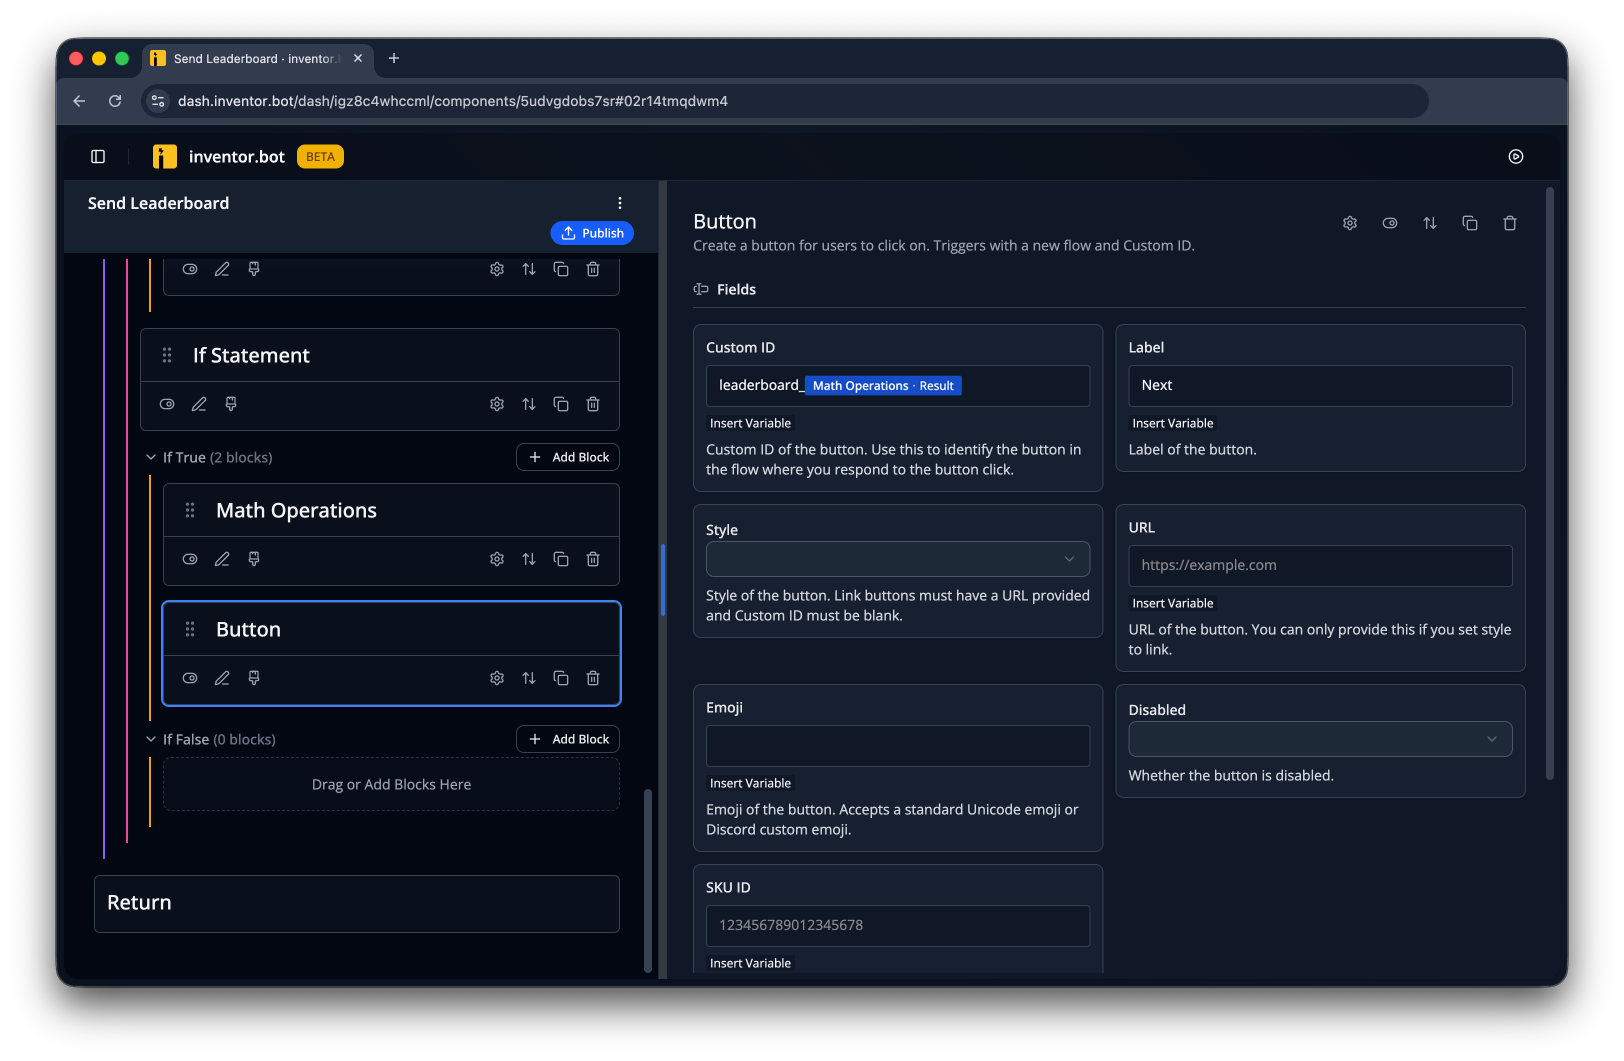
Now we'll add the disabled button. It still needs an ID, so we'll put in something random. Make sure to mark it as Disabled! If you want the buttons to disappear when they're disabled, you can skip this.
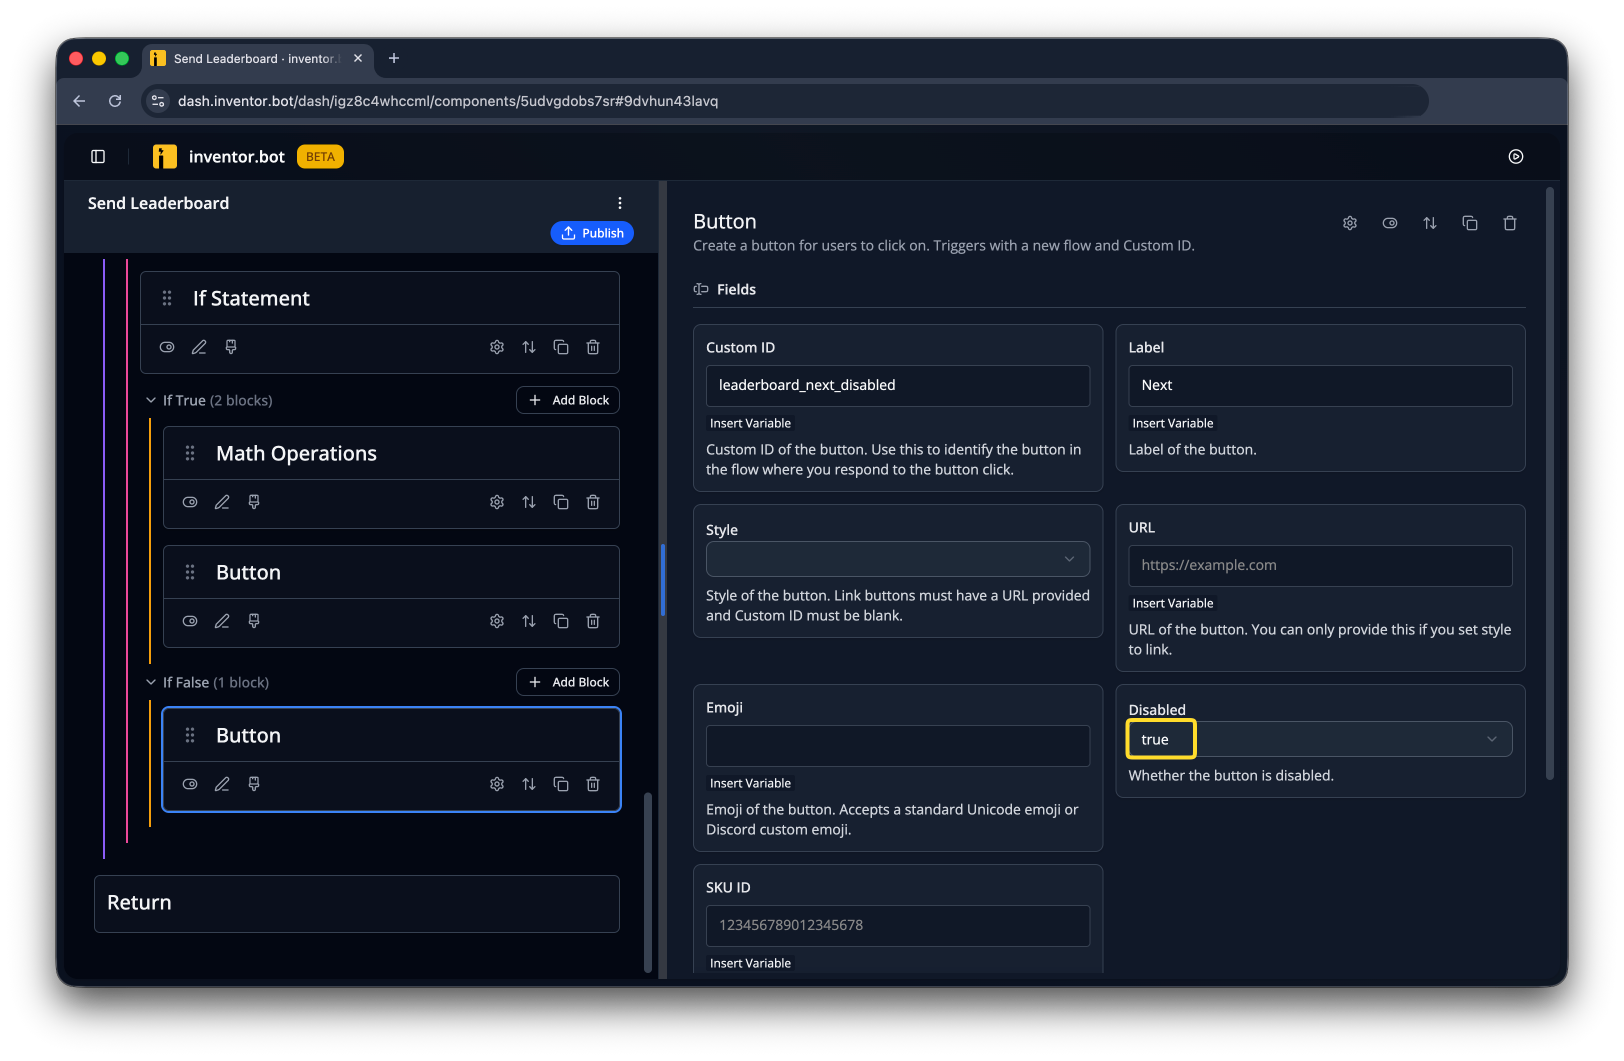
Save and publish that custom block, we're done with it!
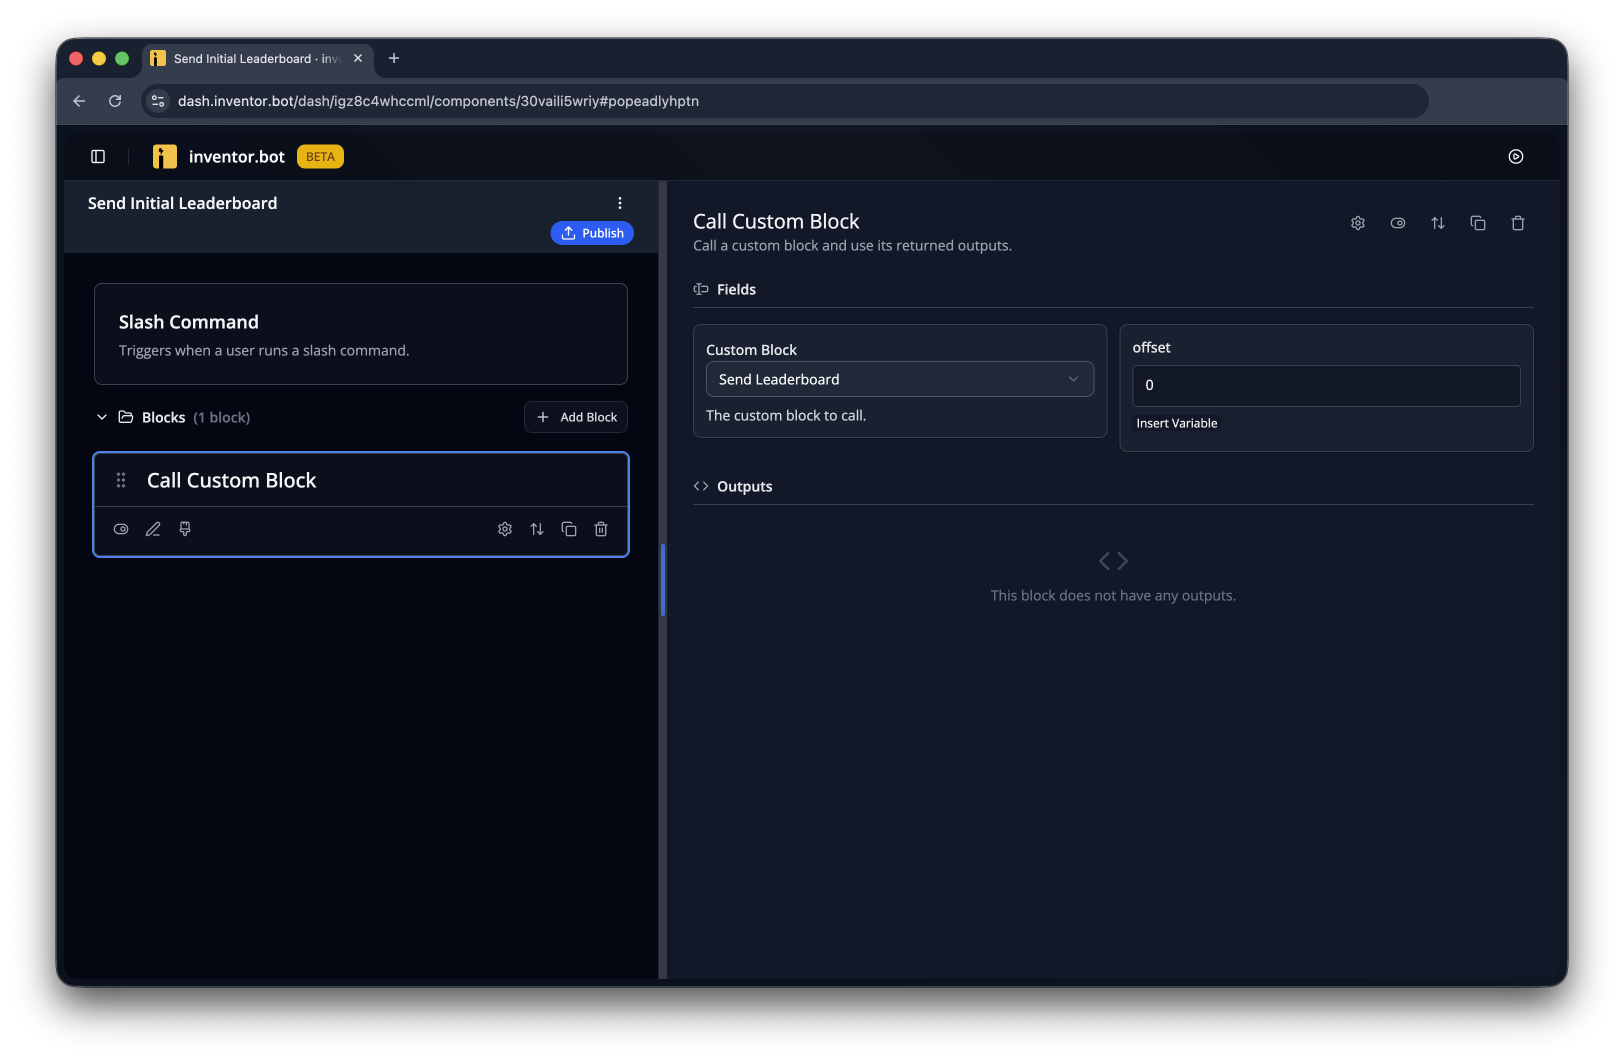
Now let's use the block in two components. This first component will be a slash command that triggers the leaderboard. Add Call Custom Block and select the one we just made. Set offset to 0
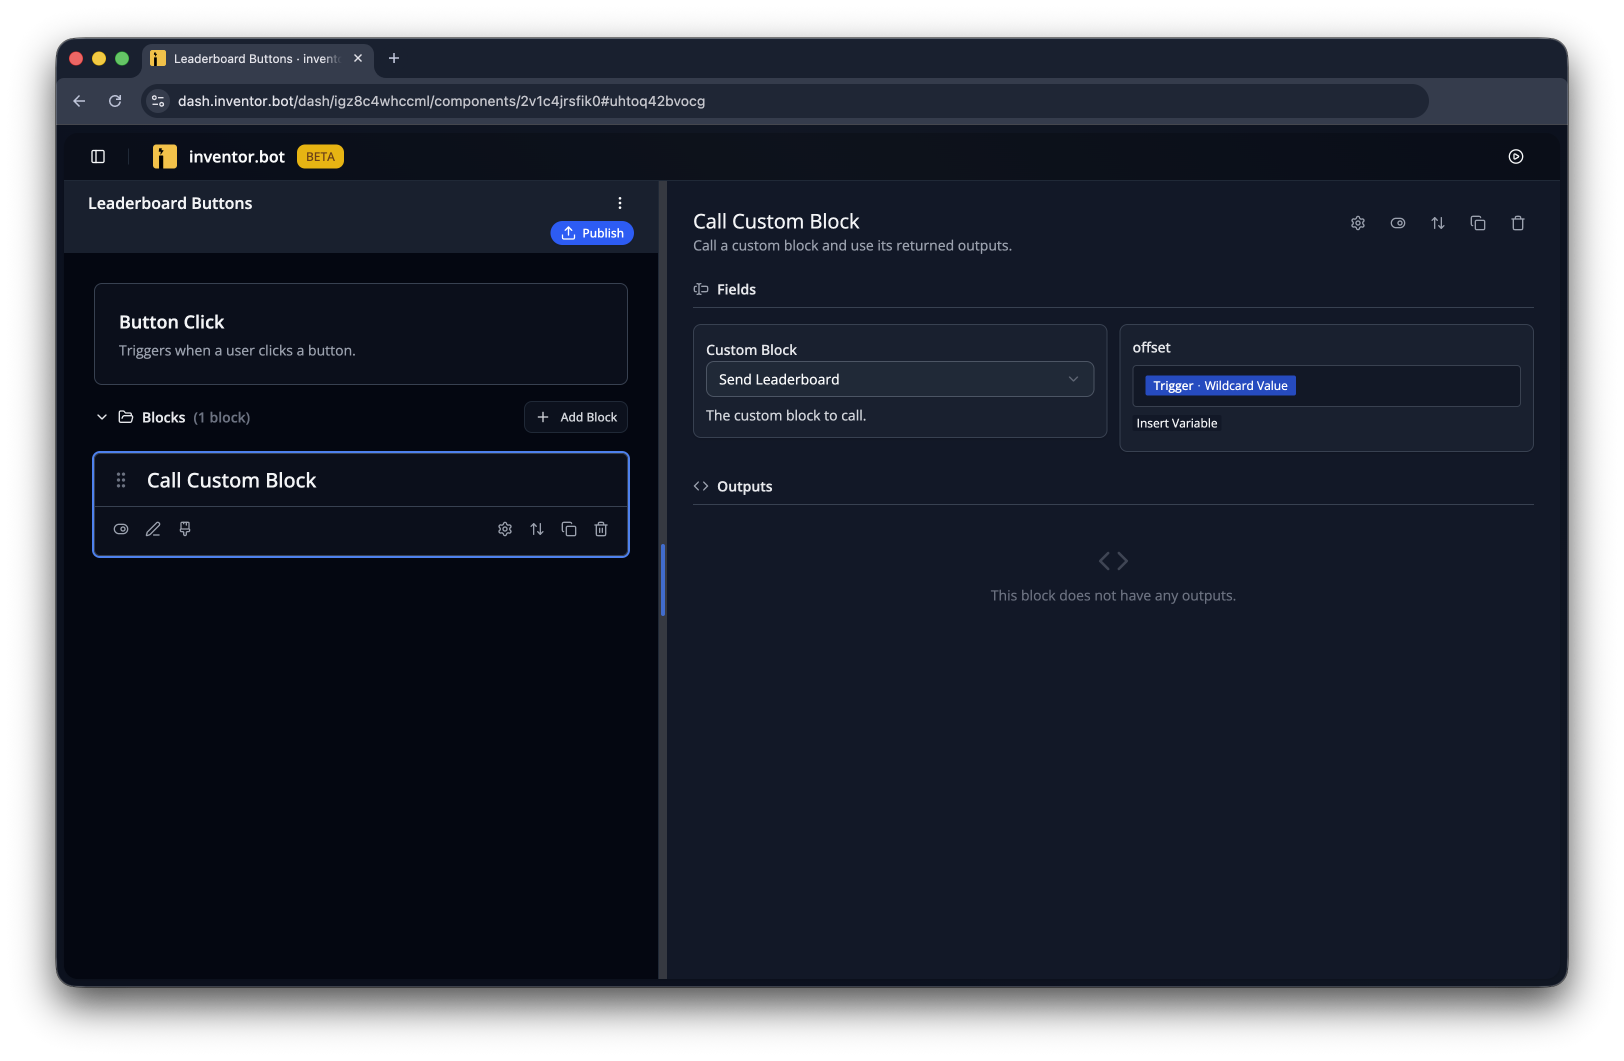
Now we'll make a Button Click flow. The Custom ID will be leaderboard_*
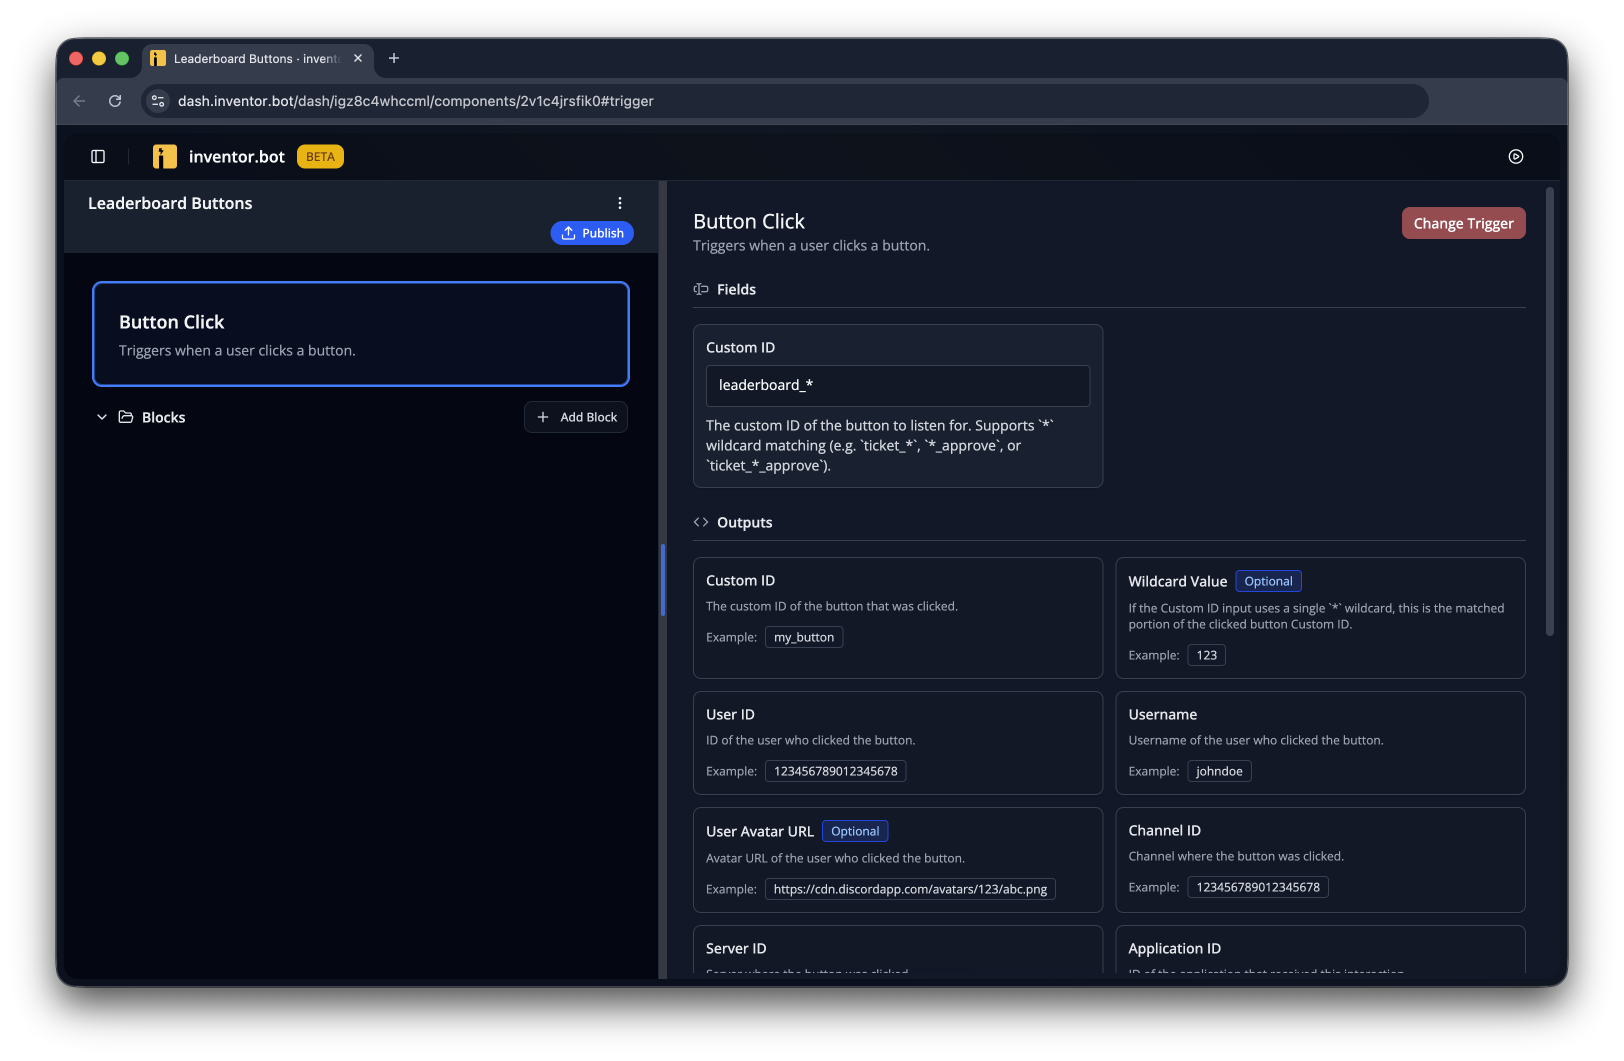
And now we'll call the custom block. The offset is the Wildcard Value output from the trigger.
That's it! Make sure both of the new flows are published, then give it a go! You should be able to flip through all the pages (and not go out of bounds!)